Reflective Surfaces with Dynamic Env Maps
Credit for this tutorial goes to Boblishman, who helped teach me how to make things shiny.
This is not that hard of a tutorial to do, however it does require:
Knowing how to use Blender, Making meshes in Blender. Basic texturing and UV Mapping in Blender.
If you do not know how to do those, I suggest that you learn them first.
Contents
[hide]Dynamic Environmental Maps
Things that are reflective in the real world work like this:
The light from the surrounding objects (You, a friend, the trees, and the Bahro behind you), strike you, bounce off of you and on to another surface. Depending on that surface's reflectivity, will depend on how much of that light bounces back. A highly polished surface, with silvering (a mirror) will reflect back almost 100% of that light. Hence why you can see yourself in the mirror. A chalkboard on the other hand has a very LOW reflective surface, and very little of that light will be reflected back.
That's how it works in the real world.......
That is NOT how it works with 3D graphics.
Instead, we FAKE it. Because, again (if you've read my Light Map tutorial), we don't really have photons whizing around in the game. Instead, we have textures being presented.
If we want a surface to appear "Shiny", then we think of it as being "mirror like", which means reflecting back the surroundings from it's surface. Well, we can't make something reflect, because there are no photons to bounce off it, but we can take images of the surroundings and place them on the object, making them look like a reflection.
These images when put together, are called a Environmental Map (this will be covered in the last section).
If we can have the game update these images in real time, we then call it a Dynamic Environmental Map.
So let's go make a floor shiny.......
Mirror, Mirror, On The Wall......er....Floor....
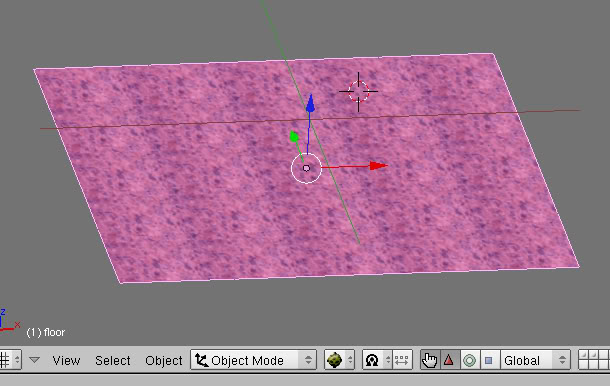
Okay, first we need a floor:
We'll use this one from my Nexus I made. It's just a red granite surface. Now we'll make it shine like you see the floors of banks or government buildings.
First, and this is important, when you do this, your object needs something that will be reflecting back. In other words, a ball floating in empty space will not work. A room, or some environment with things that can be reflected will.
Go ahead and texture your floor as normal and UV map it.
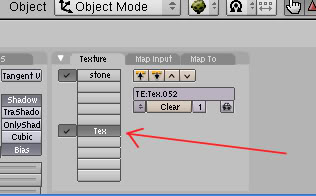
Now go back to the Textures Panel and create a 2nd texture:
Now in the drop down box, instead of picking "Image", pick "EnvMap" instead.
A new tab will pop up called "Envmap". Like in my pic above, make sure the "Static" and "Cube" buttons are selected (they are by default).
Now go back to the Materials Panel:
Make sure our new texture is selected.
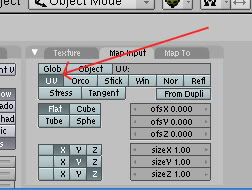
Now click on the MapInput tab and make sure UV is selected:
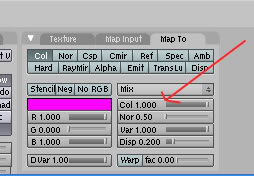
Now click on the Map To tab, and take a look here:
The "Col" slider that I'm pointing to with my arrow is defaulted to "1.000"
A setting of 1.000 will make our object VERY reflective, and depending on the original texture, will be a shiny as a mirror.
I've found setting it to 0.400 works quite well, but don't be afraid to play around with this. Just remember, the closer you get to 1.000 the more shiny your object's surface will be.
Now for the last part: ALCScripting.
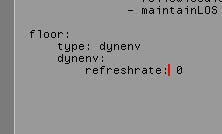
Oh, don't worry, this part is easy. Simply put the following lines in your ALCScript:
<yourobjectname>:
    type: dynenv
    dynenv:
        refreshrate: 0
Where <yourobjectname> is the name of the object you are trying to make shiny:
Here's a pic:
Now, let me talk about that "refreshrate" in the script.
I recommend that you keep it at "0". This is how often the game will update the EnvMap on the object. If you set this number to "30" it will do so every second. However, at "0" the map will be drawn once at link in, and that's it. This will keep the avatar reflection turned off.
If you link in to certain places in Uru, you'll notice that while in 3rd person mode, you don't see your avatar's reflection. This is because the real time updating can tax a low end computer, so many of Cyan's maps are set to a refresh rate of "0", so everyone can enjoy the game, with no buggy looking avatar reflections.
Now, you can change that number if you want, and experiment. Just remember that not everyone out there has a high end computer and can deal with it.
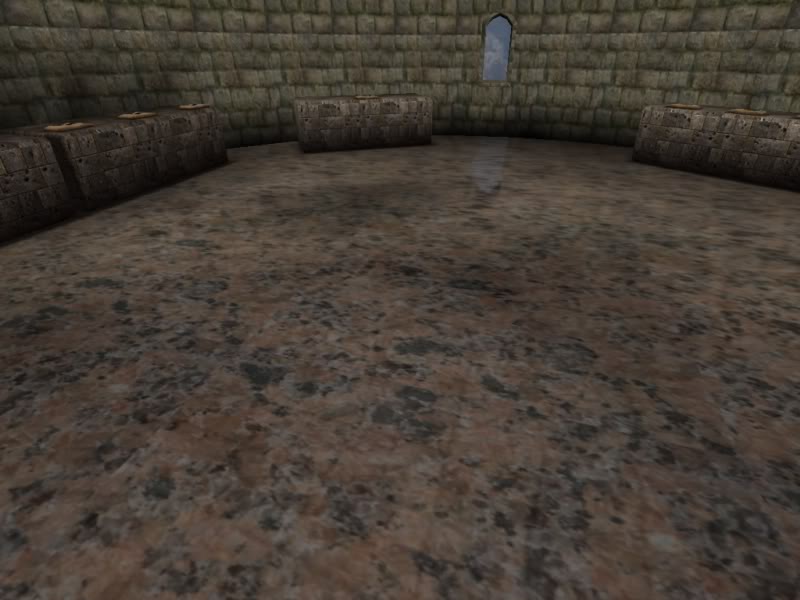
Okay, that's it for making an object shiny all over. Let's export my Age, link in and take a look:
You'll see the shiny floor better as you move about the room, but in the image above, you can clearly see the window being reflected on the floor.
Okay....But Can I Only Do Floors?
Oh you can do anything if you'd like. I highly recommend this for small bodies of water that are NOT wavesets (fountain pools, puddles, etc). Large bodies of water like Ponds, Lakes or Oceans we use Wavesets and the reflectiveness is built into the script already.
But let's say you have shiny copper or brass pipes of some D'ni machinery....it will work great on them! Glass windows! Brass door steps! You name it! Have fun!
But Andy, I Only Wanted Part Of My Object Shiny.....
Okay, okay, that's not a problem either.
In that case, you need to have a THIRD texture, but one that is located in between the first texture and your EnvMap texture. This 3rd texture will be a "Stencil"
You'll be doing the same thing here, except where you paint the white stencil is where you want the texture to be shiny, leave the other parts black.
That's all you Have to do to get that. Examples of this are:
The Classroom Doors in Bevin, the floor around the fountain in Bevin to name 2.
I hope you found this tutorial helpful.
Using an Image as Environmental Map
The process is so similar to a Dynamic Environmental Map that I'm not going to write a new wiki page for it (although the title of this one now no longer fits). Basically you still follow all the steps described by Andy except that you skip the AlcScript.
Then in the Textures Panel you have to change "Static" to "Load". Now you can select the texture you want to use for the reflection.
Note: If your texture does not show up in the preview window it has not properly loaded and you will get an error upon export. To fix this simply clear the "Ob:" field as shown in the example and reload the texture.
Return To: Main Page

