
PyPRP:Stencils
|
|
This is a tutorial page.Versions available: PyPRP; 3ds Max; Korman. |
Welcome to the GoW Plugin stenciling tutorial. This tutorial assumes you have followed the instructions on installing PyPRP and have a fully functional Blender installation with the GoW plugin. This tutorial will show you how to use basic stencils, painting stencils, and using GLSL stenciling. First, we examine simple stenciling and the basics of what a stencil is.
Contents
[hide]Stenciling Basics
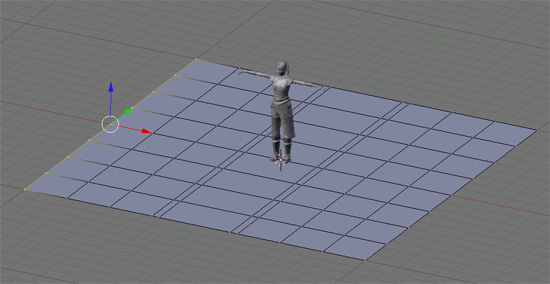
What a blender stencil does is use a black-and-white or alpha image to decide which part of a texture to show and which to hide. By combining two textures separated by a stencil you can have parts of both appear at will. See Fig. 1 for an example.
Cyan uses stencils primarily to do simple blends between terrain textures.
- Begin with a simple model. In this basic tutorial: a flat solid plane.
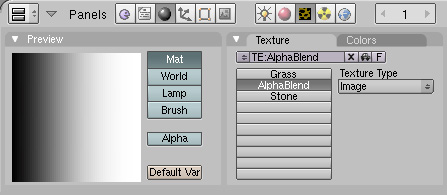
- Choose your textures. See Fig. 2 for textures used in this tutorial.
- Add the textures to the texture section of the materials page.
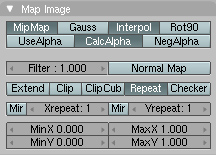
- To enable the stencil, click the CalcAlpha button for the alpha blend image.
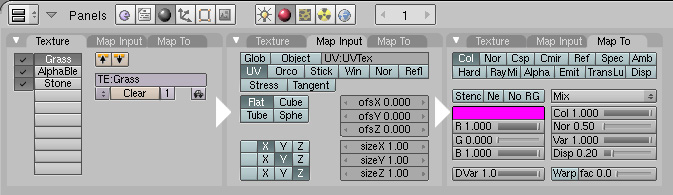
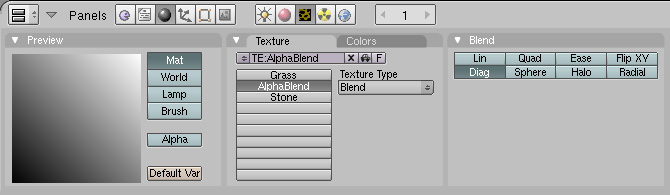
- Set up the settings for the two regular textures. Both regular textures should have identical settings and should be set this way by default.
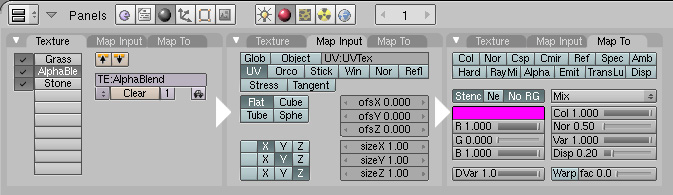
- Set up the settings for the stencil layer. Deselect the "col" button, select the "Stencil" button, and select the "No RGB" button.
- Side note: If you are using one of Blenders texture blend types as a stencil then the No RGB button can be left alone. When using an image, this setting is crucial.
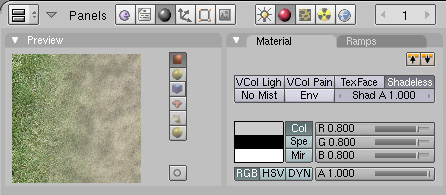
- The material preview window should now show the blend from one texture to the other.

Stenciling Using Blender-Generated Blends
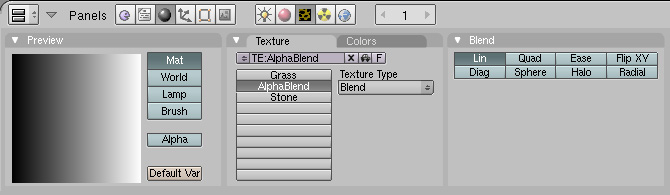
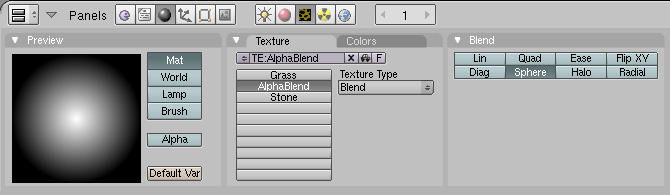
Blender is able to create simple stencil blend images for you. The GoW plugin can handle all of these blend types and will create the necessary 64x64 mipmaps to be used in Plasma. The following are examples of the blends you can create using Blender: Linear blend (the Quad and Ease types are linear too, but emphasizing black or white, respectively) Circular blend (the Halo type is also a circular blend but smaller) Diagonal blend
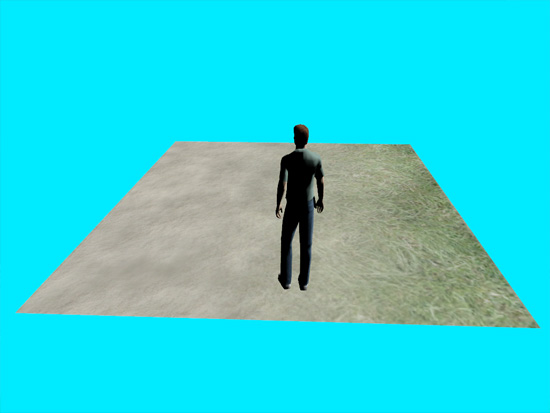
How Stencils Look in Uru
- The example stencil in Uru.
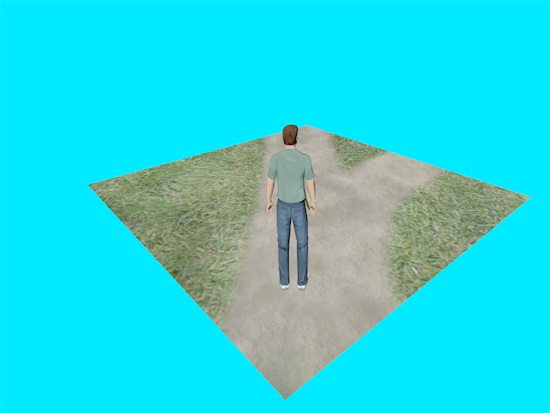
- How a "pathway stencil" looks in Uru. (see Fig. 3 for the textures used)
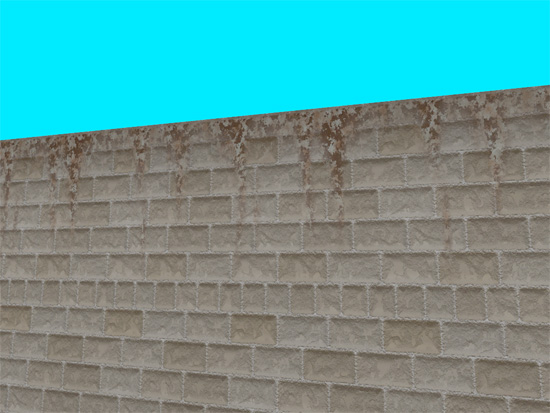
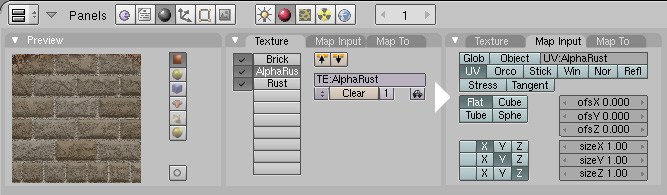
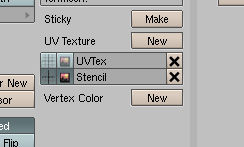
- A rusted wall example in Uru and a second view. (see Fig. 4 for the textures used) This example uses multiple UV maps: Wall, Rust, and AlphaRust. To make a new UV map, click the "new" button to the right of "UV Texture". After creating the map, specify the map in the "Map Input" section of the texture tab.


Painting Stencils
You can also use the Texture Paint tool to "paint" a stencil onto your model based on the model's mesh. This technique makes simple terrain-based texture changes simple. For example, this technique would allow you to easily make a transition from a grassy canyon floor to the rocky canyon wall.
- We begin with our model with a single UV Texture map.
- Make another UV Layer and call it something like "Stencil" and select to have that one shown.
- Unwrap this texture's layer with "Unwrap" option.
- Go to the UVEditor and map the texture as you would for any other texture except that this time make a new texture. Remember that no part of the UV mapping should be overlapping or tiling.
- Return to your 3D view. Your object should look black.
- Go into Texture Paint-mode in the same mode-selector as you go into Vertex Paint-mode with.
- Get a white brush and paint where ever you want there to be your certain texture. (In our original example, you would paint everywhere you wanted rock)
- Return to the UV mapping window when you're done and save the resulting image as a new file.
- Use this image as a stencil layer with the mapping of UV Layer "Stencil".
GLSL Stenciling
If you feel more confident seeing the two textures mix in Blender rather than using the greyscale stencil maps, GLSL stenciling may be something you want to use.
- Enable the new GLSL shaders. Go to the Game menu up on the top bar, and choose "Blender GLSL materials". Switch the 3D view into texture mode- this is the only mode where you will be able to see the stenciling feature.
- Bring the object which you want to texture into edit mode, and go into top view.
- Unwrap the texture and open up a UV window.
- Apply a base texture to the object.
- Create a blank stencil by pressing Alt-N while your cursor is in the UV mapping window. See Fig. 5 for the settings.
- Go to the texture tab in the shading panel with the object selected.
- Make three texture slots, all with the 'Image' property.
- In the first and third slots, load the two textures which you want to use.
- In the second slot, load the blank stencil texture by clicking the arrow beside "IM:" and choosing the pitch black texture.
- Go to material tab in the shading panel. See Fig. 6 for the settings for the first and last texture. See Fig. 7 for the settings for the stencil.
- Change the 3D Viewport from Edit to Texture Paint mode, and ensure that you are in Textured view mode.
- Click with your left mouse button, and drag over your object- you should see a new textured scribbly thing appearing on top of your object. If not, go to the editing panel (press F9 while your mouse is in the buttons panel window) and look for a tab called Brush. Click on the colored strip, and change it to black, if it is currently white, or change it to white, if it is currently black. The black and white stand for your textures. Shades of grey will be a blend between the two. See Fig. 8 for an example.


