
PyPRP:First Age
|
|
This is a tutorial page.Versions available: PyPRP; 3ds Max; Korman. |
This tutorial does not teach Blender or programming, but just shows you how to export your very first creation to Uru. Once that is out of the way, then you can fully concentrate on age creation! This tutorial assumes you have installed PyPRP. Please do NOT proceed until you have installed all the required software and the GoW plugin.
Contents
[hide]Preparing the Blender File
Before we model anything, we need to prepare the Blender project file so that the GoW plugin can recognize it and interpret it in a way that Uru can then recognize.
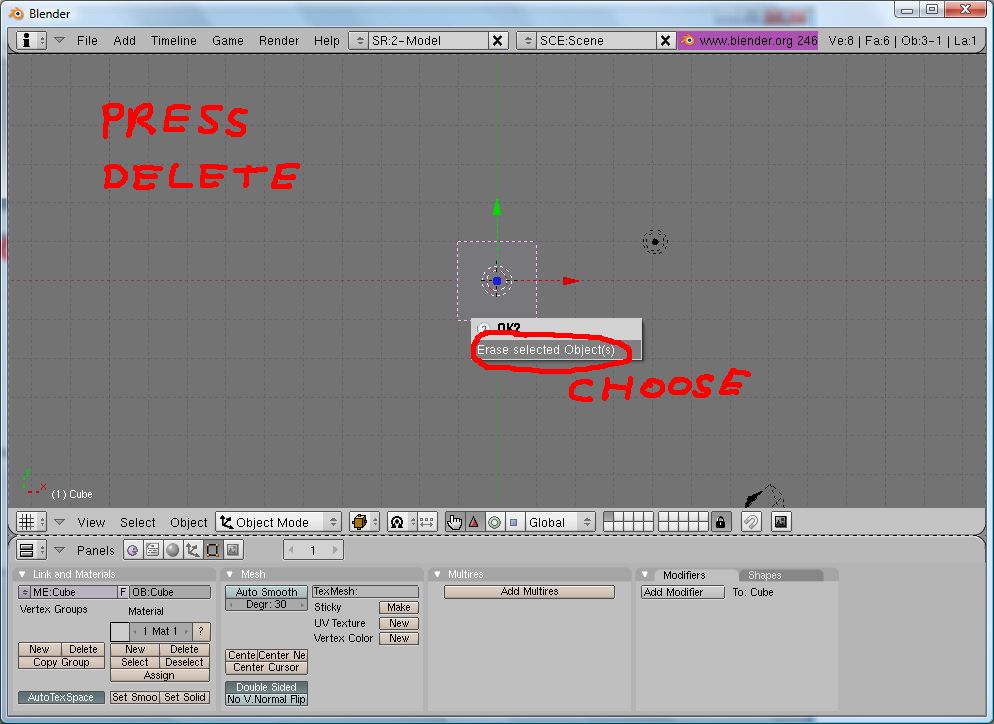
- Begin in Blender by removing the sample cube Right click on the cube to select it, press delete (or type the letter x) and click "Erase selected object(s)". This provides a clean canvas on which to create.
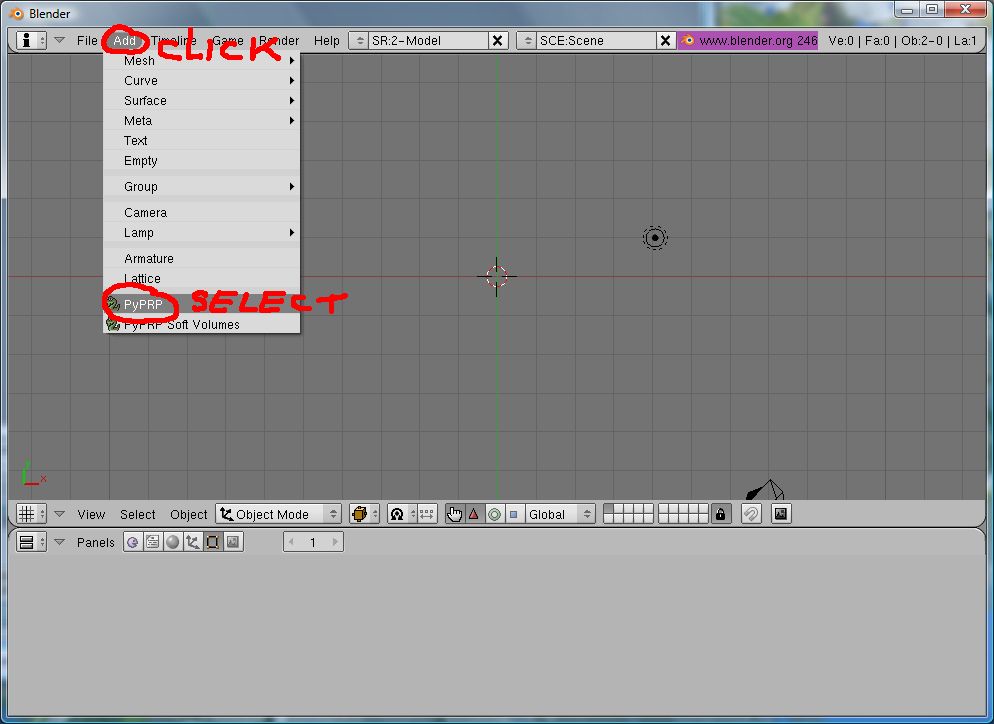
- Now we need to add an element that will let the plugin interpret this blender file as an Age for Uru. In the top menu (where you see the i), click Add - PyPRP.
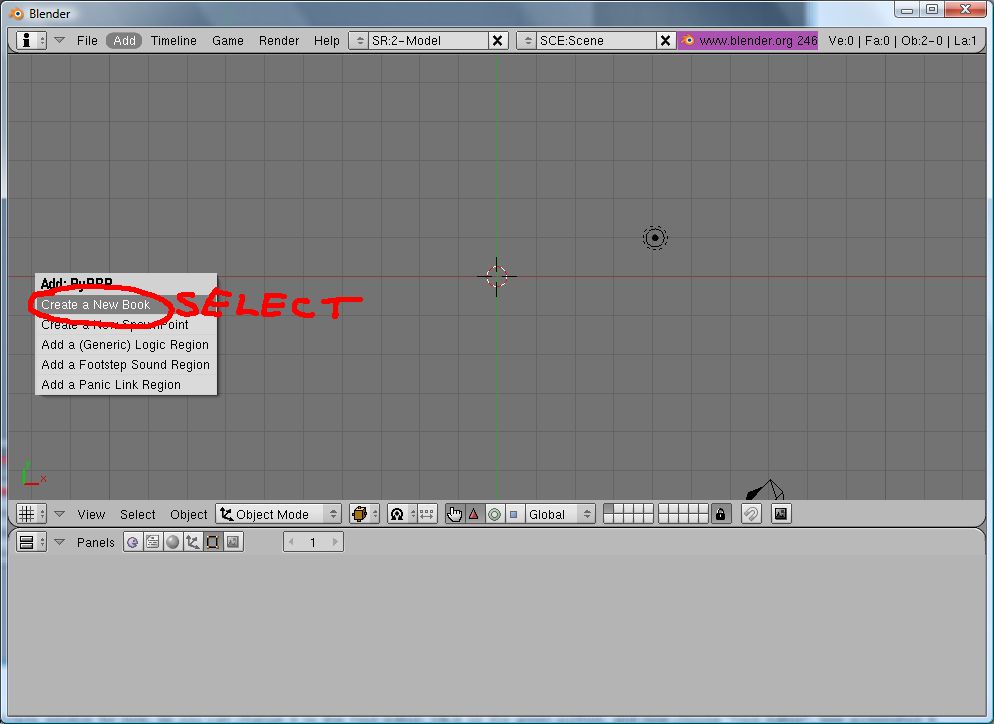
- Then, click "Create a New Book".
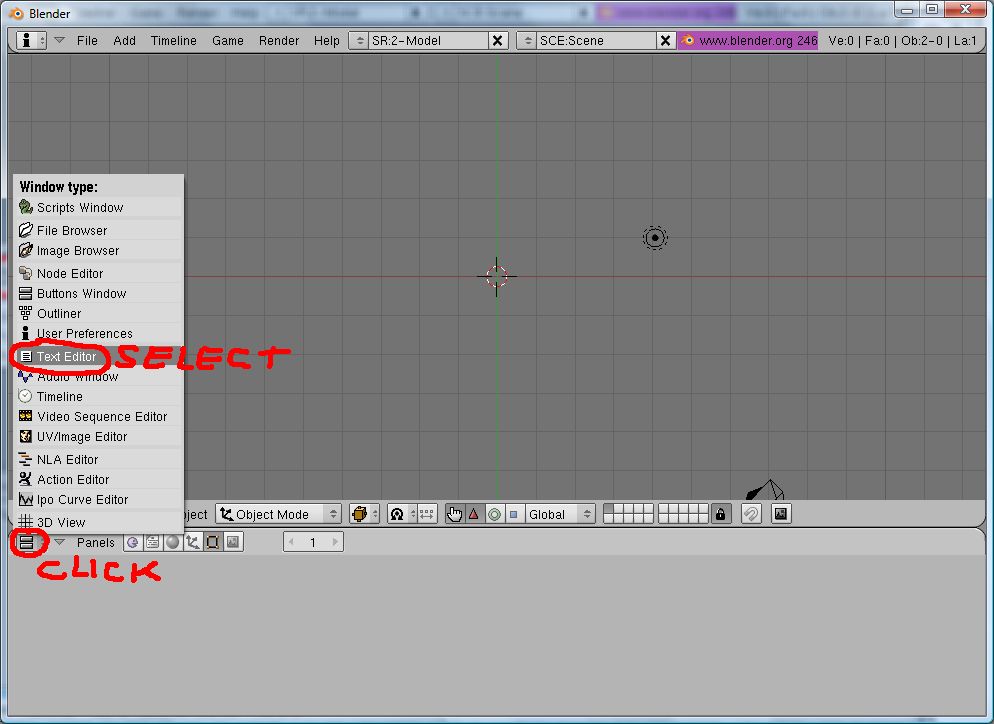
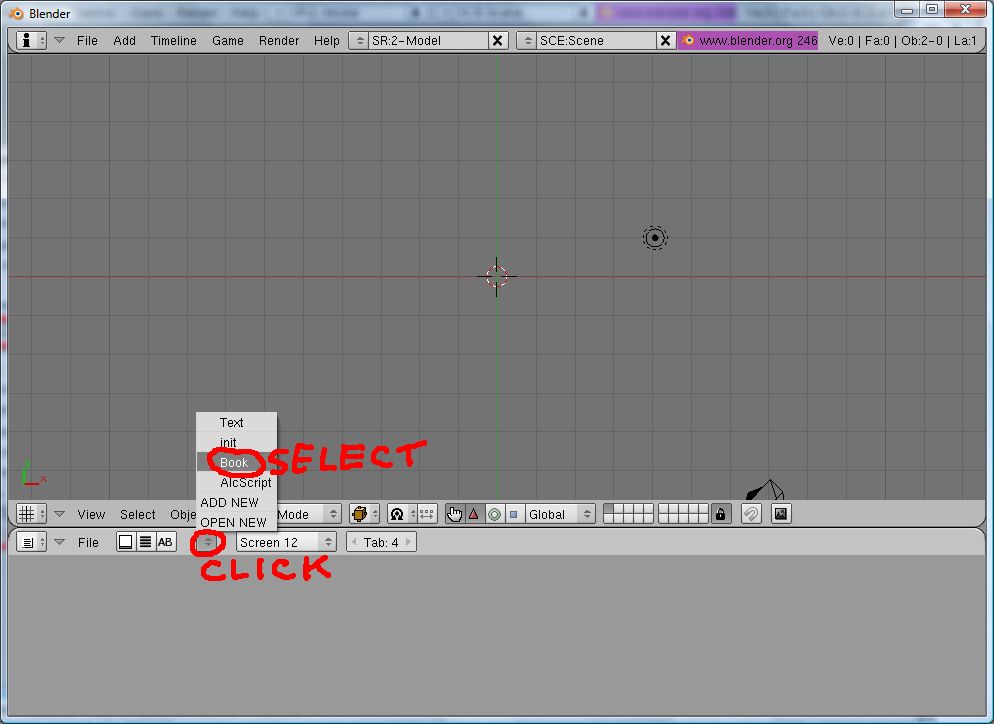
- Our book is added, but we still need to change some settings. To do that, change the Buttons Window to the Text Editor.
- Click the little button that looks like two triangles pointing up and down, and choose "Book".
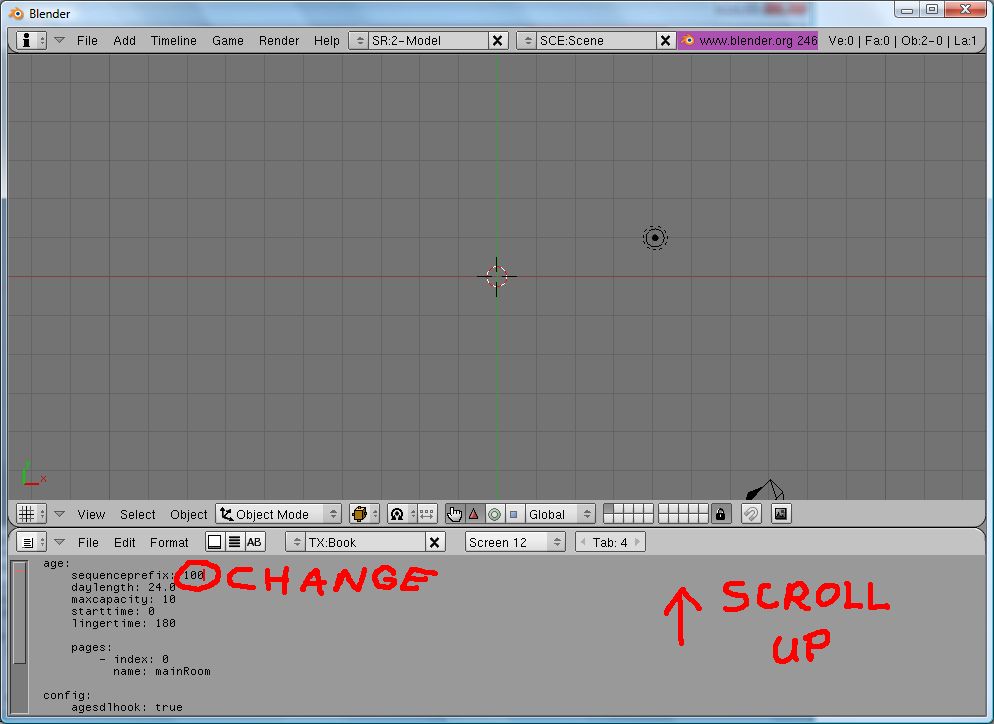
- Change the sequence prefix. Your age needs a unique sequence prefix so that the Ages don't conflict in Uru.
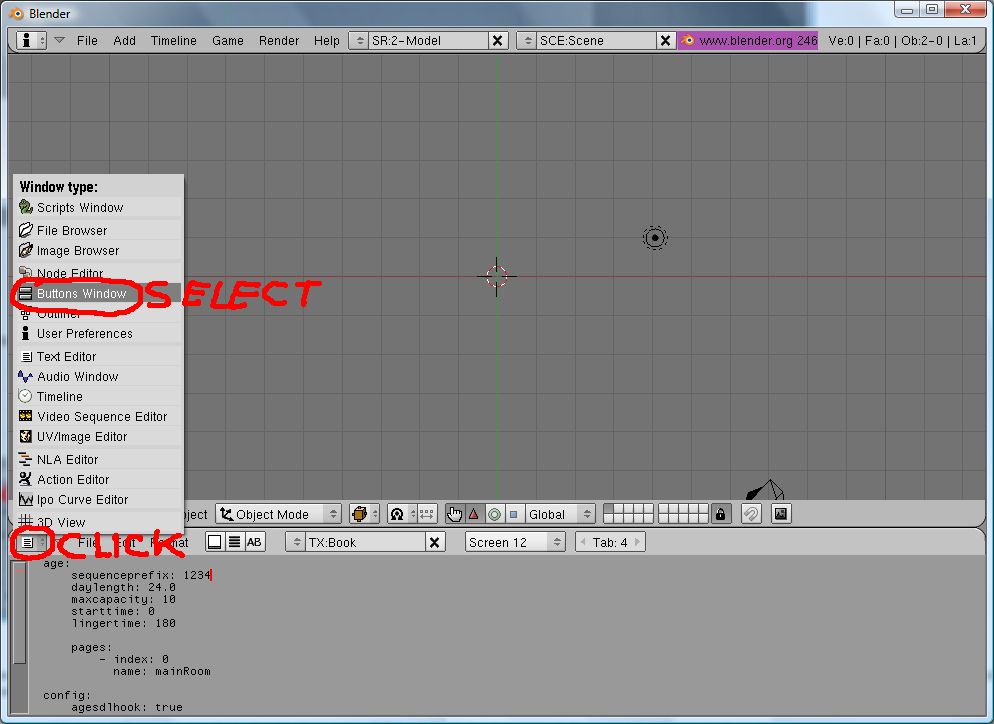
- Change the Text Editor back to the Buttons Window.
This concludes the preparation section of this GoW plugin tutorial. If you save this Blender file at this point, you can use this file repeatedly for different Ages. Just remember that for each additional age you create, you must change the "sequenceprefix".
Creating the Basic Age
The next step is to make the most elemental of Ages. This Age will consist of a solid flat sheet as our floor.
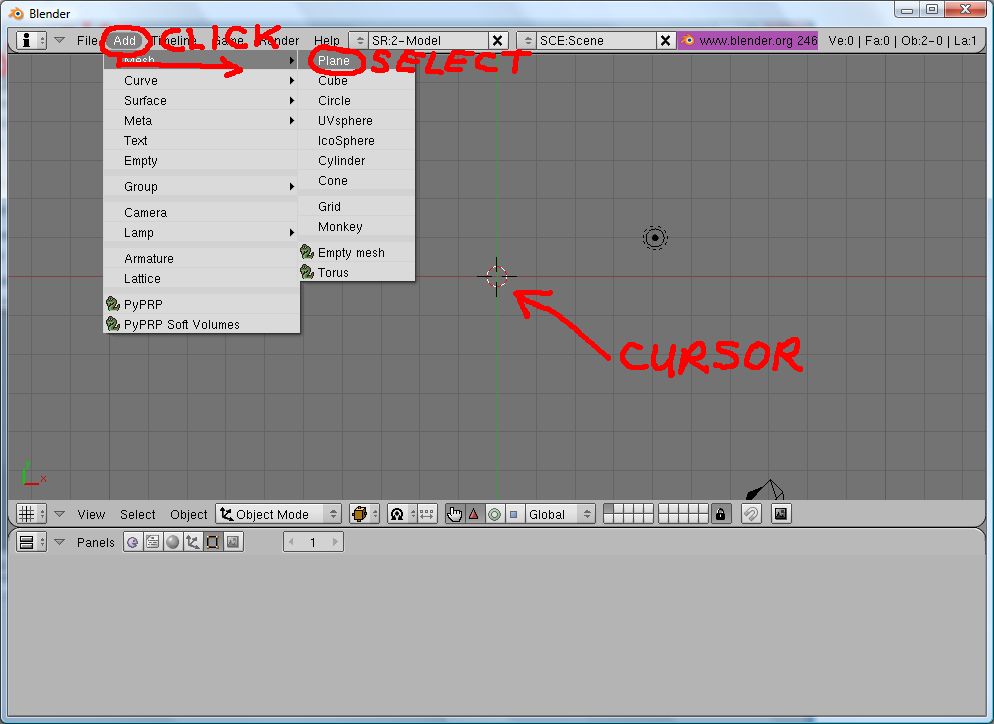
- To create the floor, go to the top menu, click Add - Mesh - Plane.
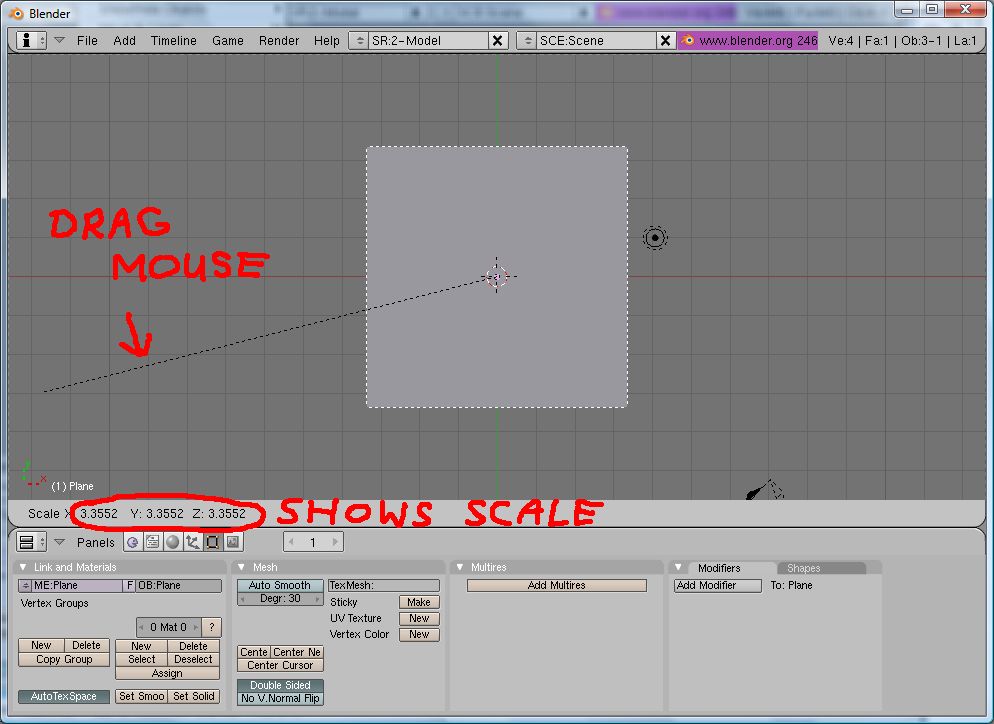
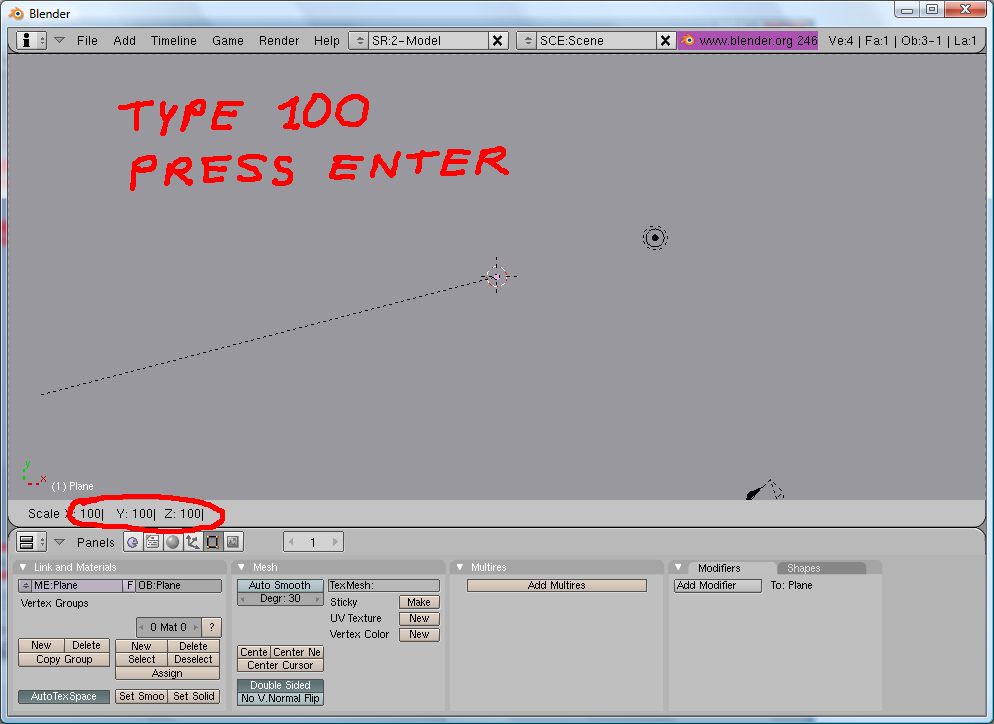
- See Fig. 1. In comparison to the avatar sample model, the plane is much too small. You will need to increase its size. To increase its size, click on "Object" in the 3d View Window, then Transform, then Scale.
- Then either drag your mouse or type in a number. The number you type in is a multiplier. For example, if you type in 2, the floor will double in size.
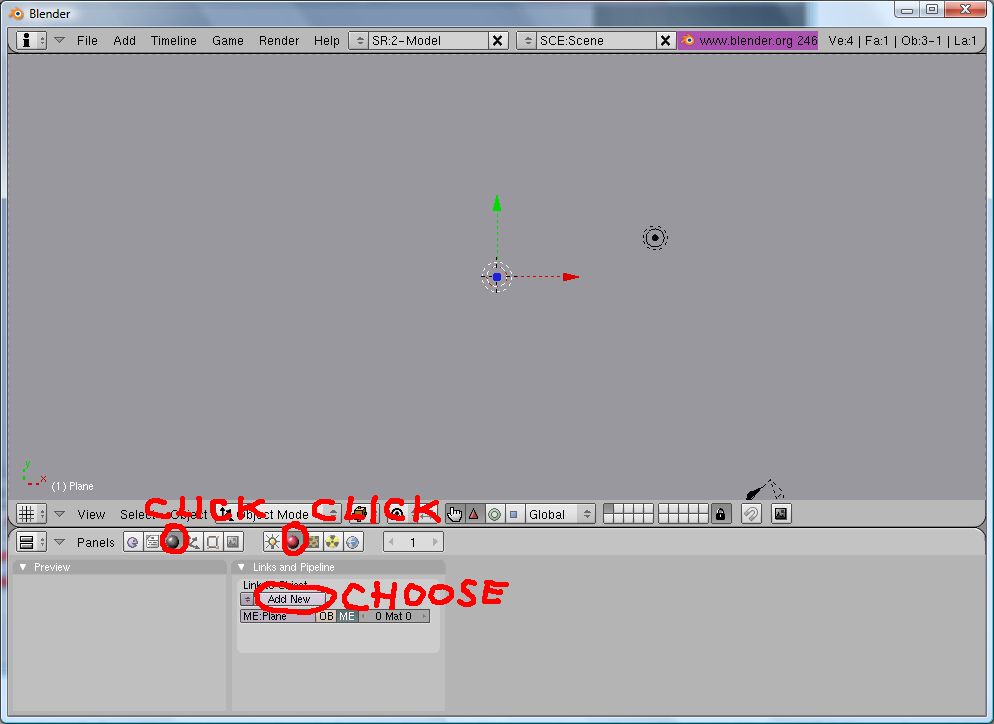
- Every object requires a material in order for the GoW plugin to export it. to add a material, click on the materials buttons and select Add New
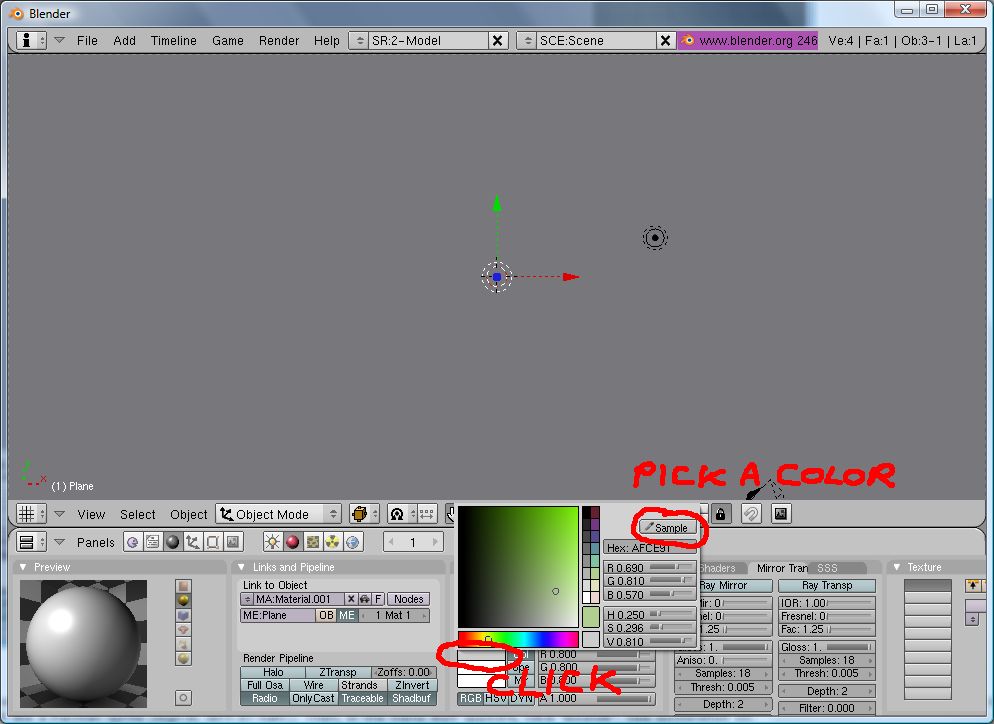
- You can change the floor's color now by clicking the grey bar and selecting a color
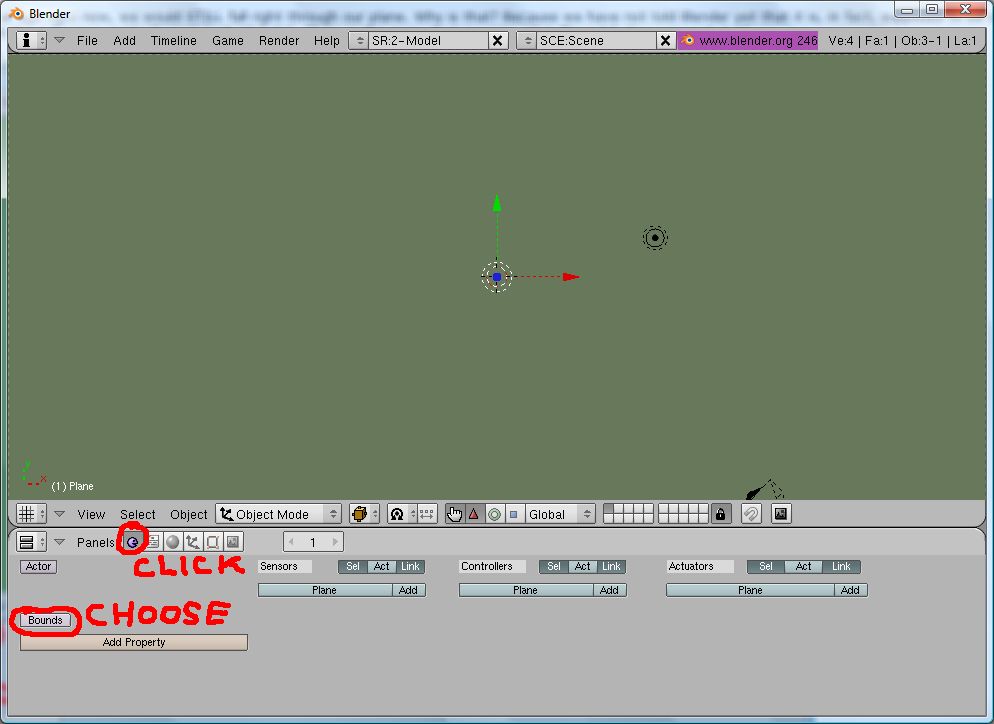
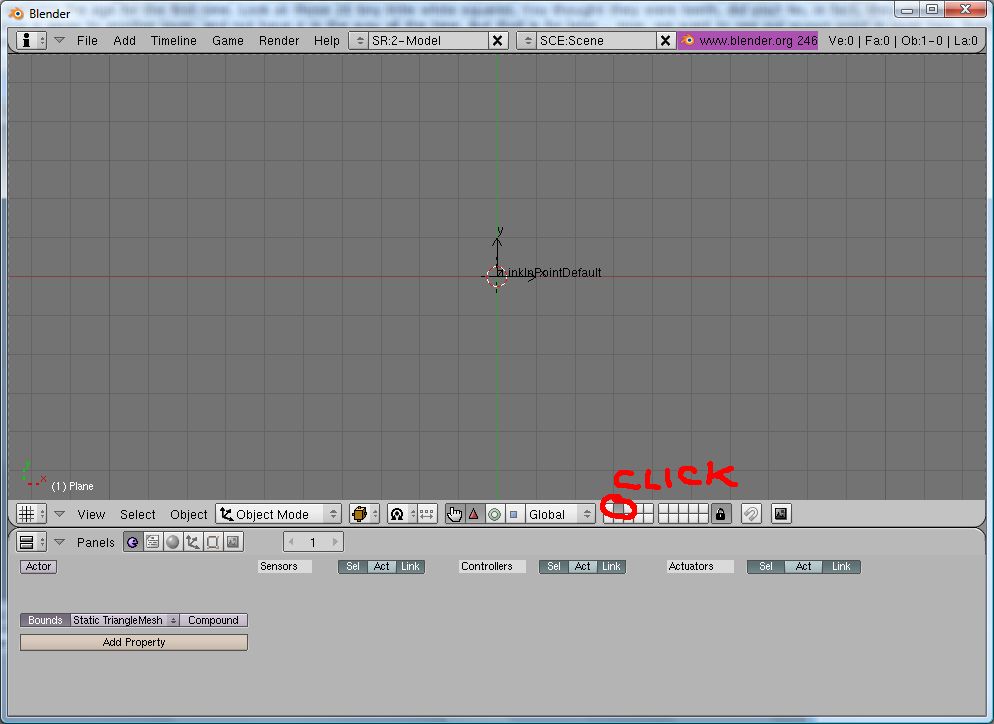
- Since this object will be what we stand on, we want it to be solid. There are many ways to make objects solid. For our purposes, click on the "Logic" button right next to Panels. Then, in the menu that appears, click "Bounds".
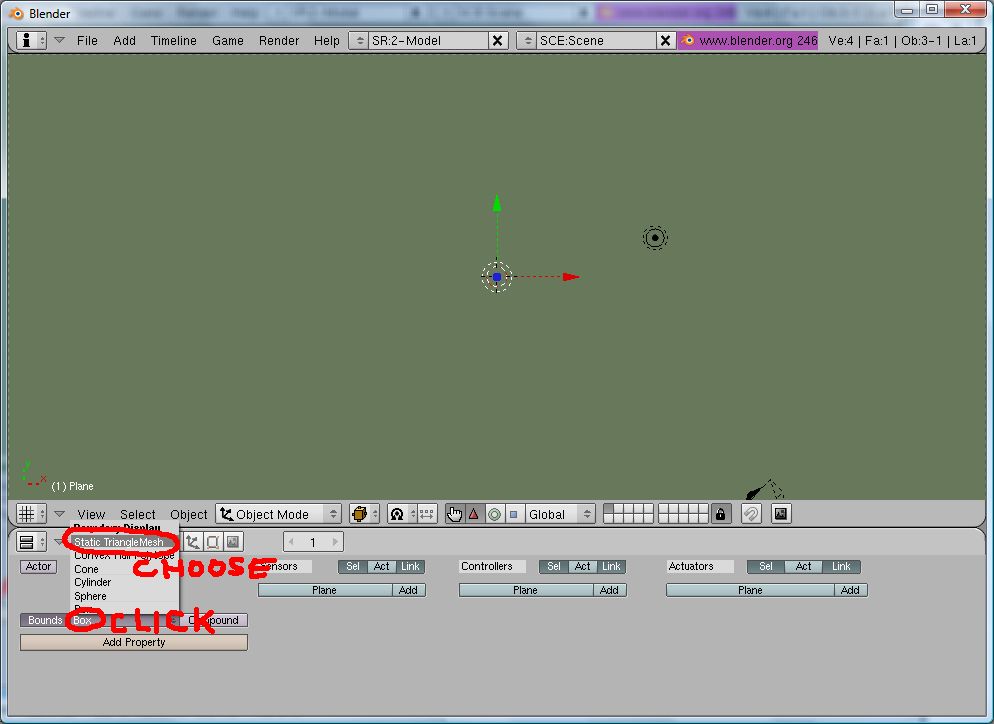
- Click on the word "Box". From the menu that pops up, select Static TriangleMesh.
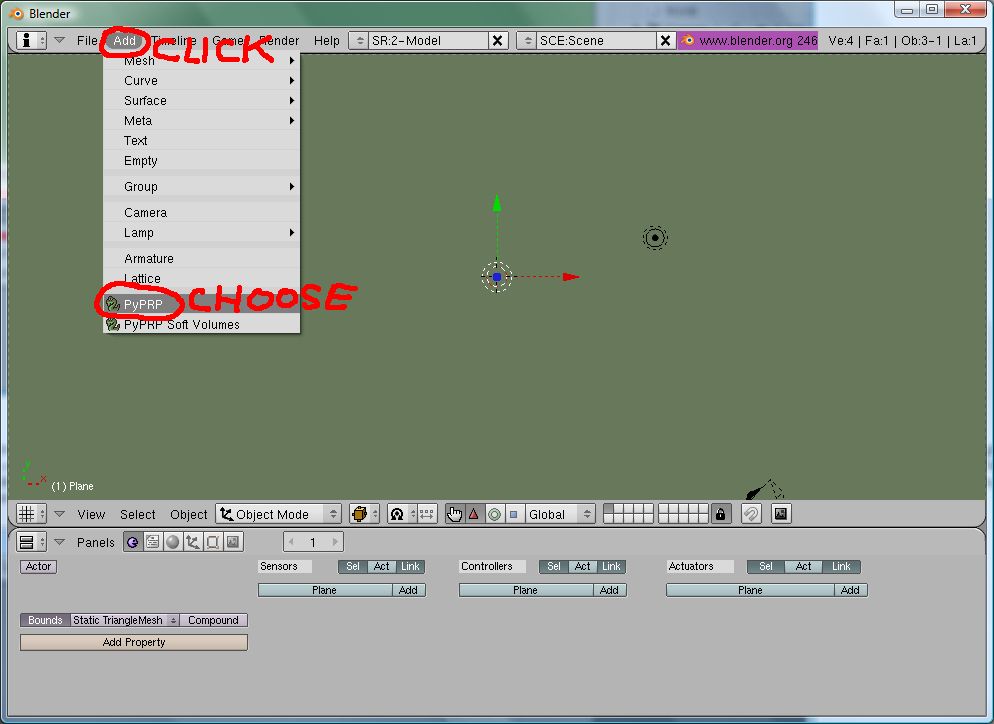
- Next, we need to add a location where your avatar will link into the Age. From the top menu, click Add - PyPRP.
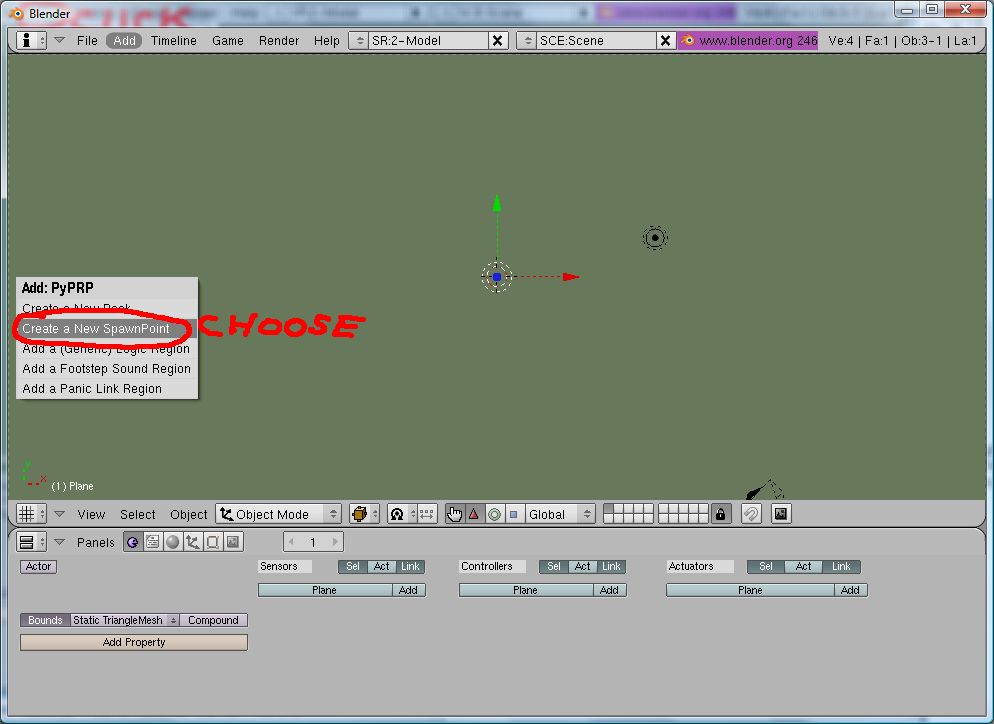
- Then, from the menu that pops up, choose Create a New SpawnPoint.
- You can view and reposition your spawnpoint by selecting the blender file's second layer, where the spawnpoints are stored. to return to the first layer, select the first square.

This concludes the modeling portion of this GoW plugin tutorial.
Exporting to Uru
Exporting the Blender file converts your model into a working Uru Age.
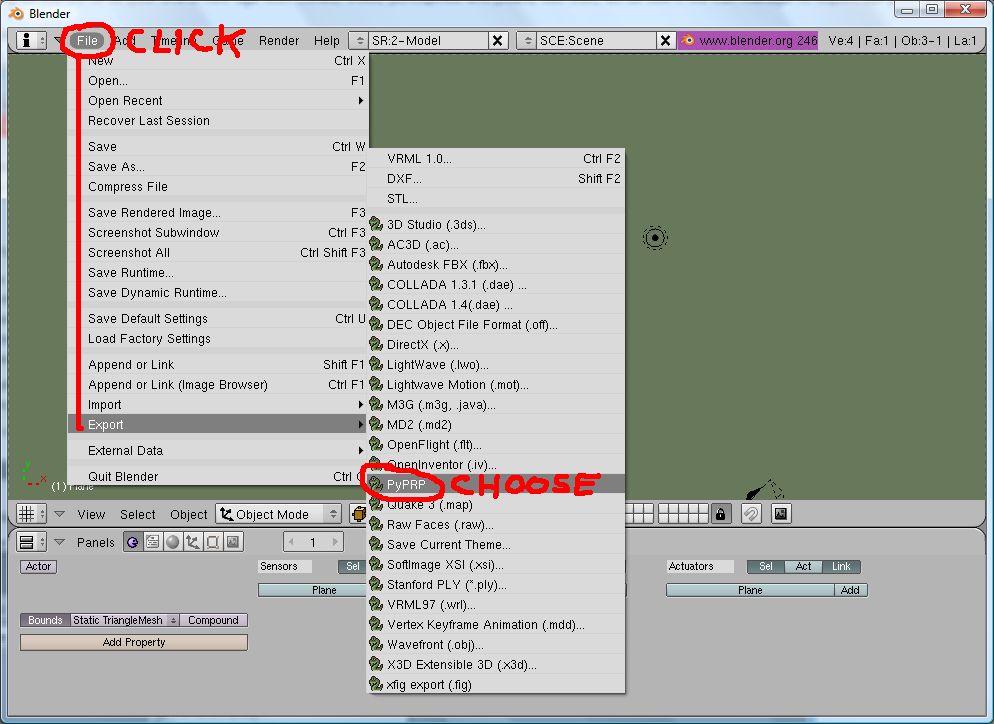
- In the top menu, click File - Export - PyPRP.
- From the menu that pops up, choose "Generate Release (.age)".
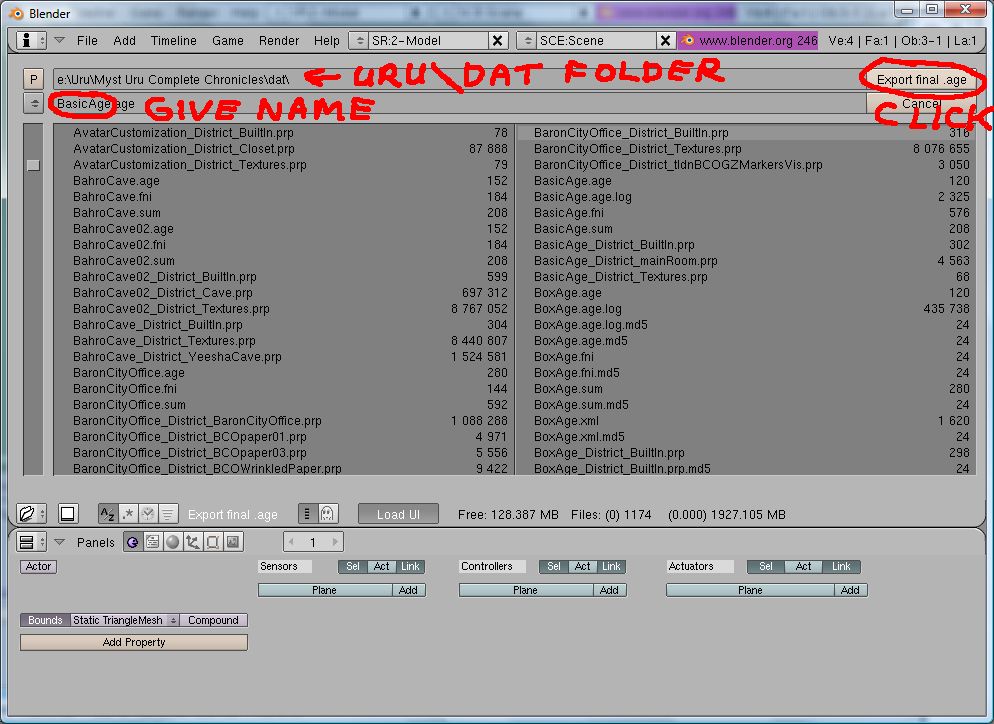
- Browse to the folder where Uru is installed and select the "dat" folder, then choose a name for your new age and click "Export final .age".
This concludes the export section of this GoW plugin tutorial. The next step is to get Uru to recognize that the Age can be linked to.
Using the Offline KI
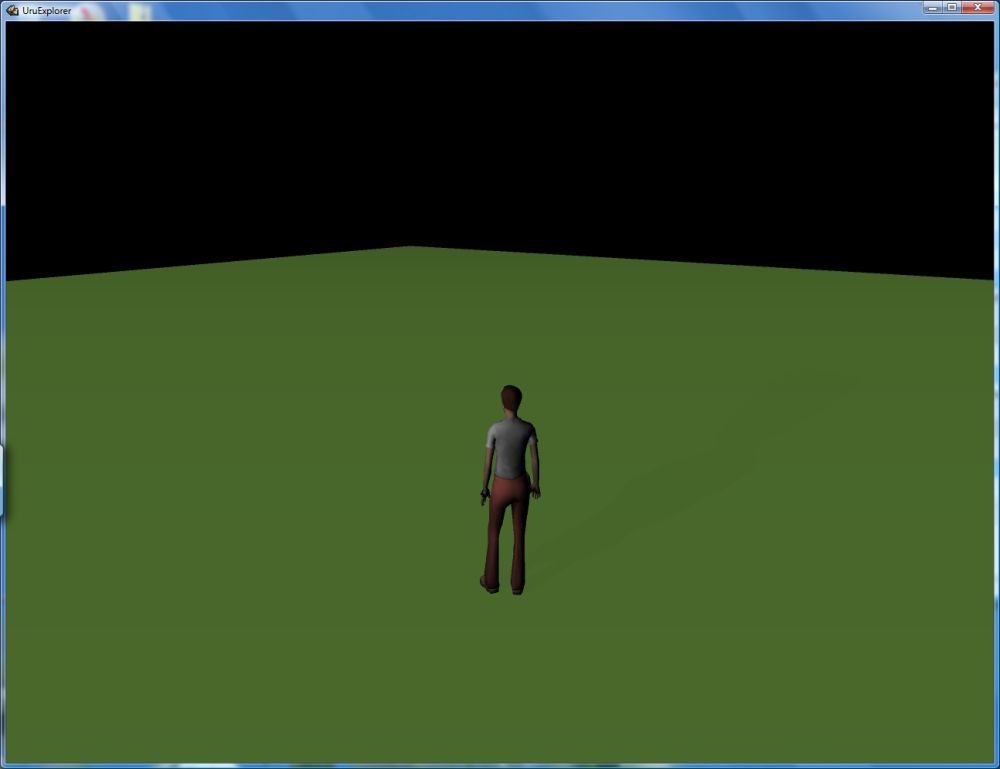
If you have the Offline KI installed, it will automatically find your age the next time you start Uru and add it to the end of the "Restoration Links" in Nexus. As an even quicker way to test your age, use the KI command "/link agefilename". Load Uru and enjoy your Age.