
Electroglyph’s Seamless Skydome tutorial
This is the text in so all I need to sort is the images :) J'Kla
There are lots of 360 degree photos of blue skies and cloudy. What if your age is really different? In This tutorial I am going to describe the process for rendering a sky dome for a world similar to Ghens prison age in Riven. It will be a water world with mesas or islands. This will allow me to place a mesa in the center and have a panic link similar to relto. If the avatar jumps and tries to reach another fake island he links away.
I am not going to go into the process of creating and modeling an entire environment. This thread describes the long and drawn out process of creating Sky Dome Textures from Bryce renders.
(Note for Blender users: You can mostly follow this tutorial even if you want to take your panorama from a (non-realtime) scene you've made in Blender rather than Bryce. Install the "Panorama Maker" plugin from Alien Help Desk and render a cubic panorama in JPG format. Then rename the images according to the table on this page (they're rendered in the same order by the plugin--1 through 6 corresponds to "ft" through "dn"), then jump into the tutorial at the first HDRShop step. I had some weird seam artifacts in my output, but the Gimp's Filters -> Enhance -> Despeckle cleaned it right up. --Rivenwanderer 09:50, 11 February 2010 (MSK))
You will need these three pieces of software:
Bryce
http://www.download.com/Bryce/3000-6677_4-10696716.html?cdlPid=10696717
HDRI Shop from the USC page
http://projects.ict.usc.edu/graphics/HDRShop/download/
Cube to Cross from Sean O'Malltey's page
http://www2.cs.uh.edu/~somalley/binaries/cube2cross.zip
Get and install these.
Now comes the fun part. Bryce by default puts out 16 bit BMP files. The jpgs it creates are not very good. HDRIShop trial version will not assemble a cross from 6 individual parts so you have to use Cube2Cross. Cube2Cross can assemble 6 images into a cross hdri but it can only assemble hdr files. HDRIShop can covert some normal images to HDRI images and back but it only reads 8bit 256 color bmp, tiff images and jpgs.
So this is what you need to do to create a full sphere.
Create a Bryce scene to use as the basis of your sphere. Set your image to a square view. Instead of 800x600 it needs to be 600x600. Small sizes that fit on your computer screen let you work faster. Get your views set up then switch to a big size for the final render 1024 x 1024 at least.
This will be a full 360° image. Remember to put things all around the camera. You will be building a box of images with a front, left, back, right, top, and bottom view. Be sure there is something interesting in each view. Don't worry if a mountain or tree straddles a corner. Change the Y and look in each direction. Make sure objects are spread out and there are no obvious gaps. If one object is behind another move or delete it.
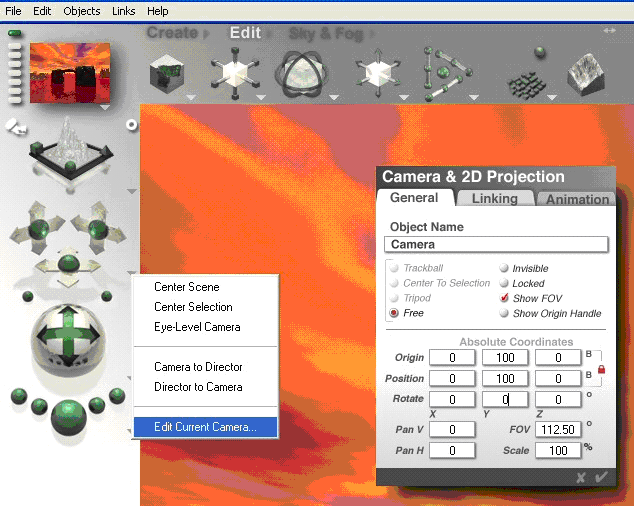

Click on the second down triangle along the left side of the Bryce view window and select the edit current camera menu. This Camera and 2D projection window will open up. Set the camera's FOV (Field Of Vision) to 112.5. Set all the Origin, Position, and Rotate to zero except for the Y. You need some altitude or you will be rendering dirt. I picked a value of 100 for the eye level from the top of a mesa. If you are going to build everything up on a cliff like the relto make your Y is high enough to make the avatar’s perspective match.


Replace ??? with the name of your image and create six views in Bryce with the camera rotations shown in the table. Turn off Link Sun to View in the Bryce Skylab to avoid banding between the images. Cube to cross needs the six images to end in the underline and ft, rt., bk, etc. to put the images in the correct orientation.
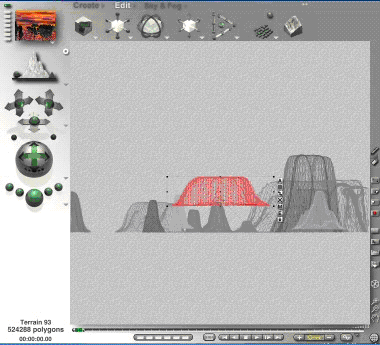

Here is a little trick. There will be a Relto like island in the center of the bottom image. Wait till all of the other views are rendered except the down view. To create the reflection of the island in the water create it now and position it above the camera as shown.
Find the six bmp files and convert them into high quality jpgs using a computer graphics program. What? You do not have one? Then what the heck are you doing reading an artist tutorial? Oh well, this is a conversion that even the latest versions of paint can do. There are also freeware like infranview that can do a great job.
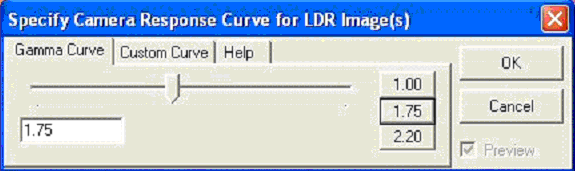

But wait a minute, Cube2Cross needs hdr images! what I have now is jpg. To fix this open HDRShop. Go to the file menu and Import LDR image. Open the ???_ft.jpg image. A window opens up to set the Gamma Curve for the image import automatically. Since mine was generated with a PC system and monitor the Gamma is automatically 2.20. But I do not want a lightprobe image I want a texture. Change 2.20 to 1.75 every time this program automatically resets it. A number closer to 1 will have less contrast. Higher numbers like 2.2 appear too dark except where the sun actually is in the image.
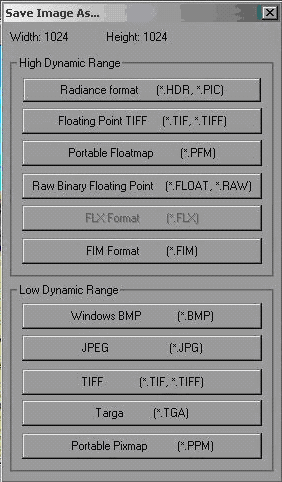

Now that the file has been converted to HDRI Save the image by pressing the file menu and pulling down to save. This window pops up. Click the top button that says Radiance format (*.HDR, *.PIC). Save the image as ???_ft.hdr and do the same for all six images. Put them in a folder together.
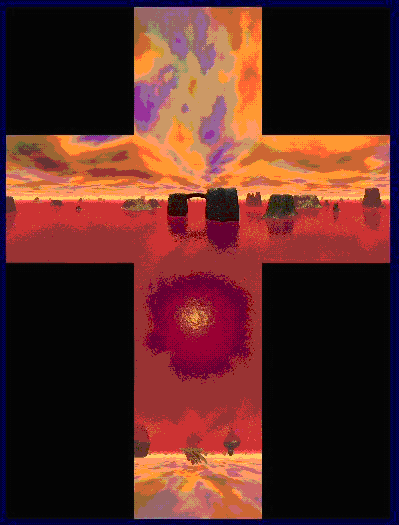

Open Cube2Cross. Open one of the images and the program will stitch all into a single cross HDRI and generate a file named ???_cross.hd in the same directory. You basically have textured a cube with the six views.
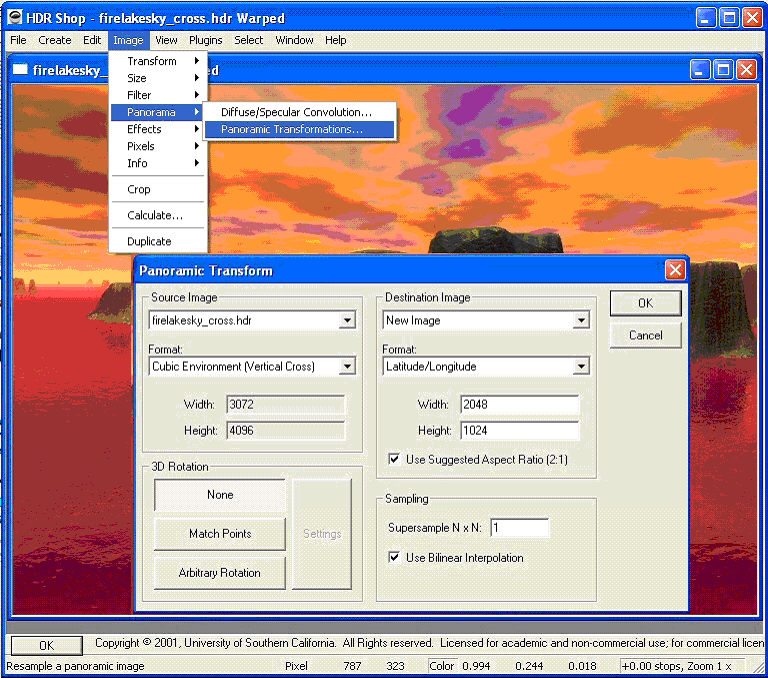

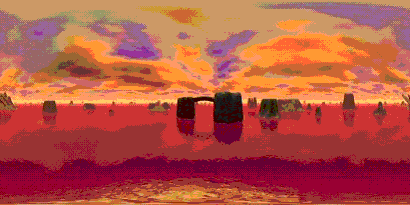
Go back to HDRShop. Open ???_cross.hdr Click on the Image menu. Pull down to the Panorama entry. Pull over to the Panoramic Transformations menu. In the Panoramic Transform window. Select Cubic Environment(Vertical Cross) as the format type in the source image. Make sure LongLat is selected as the format in the destination image. An aspect ratio of 2:1 is best so 2048 x1024 is good. Let it reduce some and do not use the same width as the original cross. Press OK. A new lightprobe image will pop up. Save this image as a JPG image and name it something.

You now have an image that you can apply as a texture on any mapped sphere.