PyPRP:Imagers
| This is a tutorial page.Versions available: PyPRP; 3ds Max; Korman. |
Contents
Introduction
This tutorial will help you set up a postable imager in your Age offline, similar to the ones in Myst Online: URU Live in various hoods and Guild Pubs.
Setting up your screen object
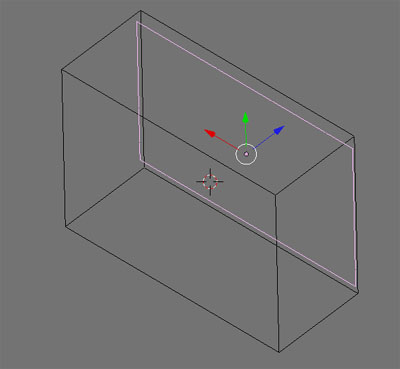
To start off, we will need the actual object on which to post, with a flat surface being the easiest method. In Blender, go to Add->Plane (or Add->Grid if you'd like to add Alpha around the edges; any dimensions will do so long as you have an outer edge of squares). Name it something unique (hit F9 for the Editing panel) that you'll remember like "MyImager01". Resize the plane/grid so that it is a bit wider and more rectangular than square.
Next, we will need a region to enter so we can post to the imager. Go to Add->PyPRP, then click on Add a (Generic) Logic Region. Rename this as well to something you'll remember. Make this fairly large so the avatar won't have to stand extremely close to the imager. Be sure to press Ctrl+A, then choose Scale and Rotation to ObData when you're done resizing to recalculate the region's new proportions for URU.
Adding a material and UV map
The screen object will need a material and texture. Add a material and a new texture. Name the texture something that you'll remember easily. For the Texture Type, choose the Noise texture.
In the material buttons, BE SURE TO TURN OFF SHADBUF (this should be done for every material in your Age anyway as URU slows to a crawl with it on).
Under your Material tab, set Col to 1,1,1 (white), then Spe to 0,0,0 (black). Spe will act as the background for text posts, so it must be dark to work against the white text. Be sure to make sure Shadeless is pressed and that the Amb slider in the Shaders tab is set to 1 (full bright). The Spec slider should be at 0 too.
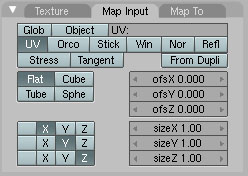
For your texture, under the Map Input tab, select UV.
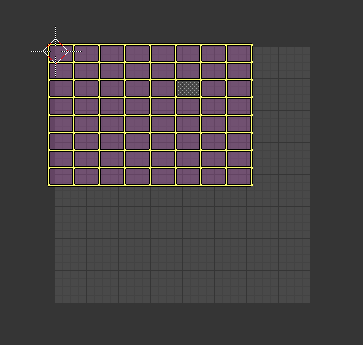
Hit Tab to go into Edit Mode and press U, then select Unwrap. Note that you MAY need to play with the UV mapping a bit to center your imager's contents properly. Also be sure the plane's/grid's normals are facing the way you want the imager to face.
An example of how the UV mapping should be positioned to center properly. It might need slight adjustments.
Optional: Making the edges of your imager transparent
The easiest way to do this is to use vertex paint or, if you don't mind an extra texture, a stencil. Both methods are detailed in the tutorial Giving It Substance.
Scripting your imager
Here is the generic AlcScript for an imager, which utilizes URU's default xSimpleImager script:
<imager region>:
    logic:
        modifiers:
          - name: cRgnImager_Enter
            flags:
              - multitrigger
            activators:
              - type: objectinvolume
                triggers:
                  - enter
            conditions:
              - type: volumesensor
                satisfied: true
                direction: enter
            actions:
              - type: pythonfile
                ref: :cPythImager
          - name: cRgnImager_Exit
            flags:
              - multitrigger
            activators:
              - type: objectinvolume
                triggers:
                  - exit
            conditions:
              - type: volumesensor
                satisfied: true
                direction: exit
            actions:
              - type: pythonfile
                ref: :cPythImager
<imager object>:
    logic:
        actions:
          - type: pythonfile
            name: cPythImager
            pythonfile:
                file: xSimpleImager
                parameters:
                  - type: string
                    value: "<name of imager>"
                  - type: dynamictext
                    ref: dyntextmap:<imager object texture>
                  - type: activatorlist
                    refs: ['logicmod:cRgnImager_Enter', 'logicmod:cRgnImager_Exit']
                  - type: int
                    # This is the number of seconds a post stays on screen
                    value: 10
                  - type: bool
                    value: false
                  - type: sceneobject
                    ref: scnobj:<imager object>
                  - type: int
                    # This is how many posts can go up on the imager
                    value: 25
For the first part, you only need to put the name of your imager's region in place of <imager region>. Put the name of your imager screen object in place of <imager object>. The <name of imager> can be anything you want within reason (ie not too long and no weird characters). The <imager object texture> is the same texture you set as Noise a moment ago.
Adjust the two integers to change seconds of time a post remains on screen and how many posts can go on the imager.
NOTE: when preparing your Age for an online shard, it is best to keep the final integer somewhere between 5 and 10 posts per imager.
You may now export your Age with the new imager.
Fixing the imager in PrpShop and PlasmaShop
If you enter your Age now and try to post, you may notice that text is posting, but not pictures. We will need to fix a couple of things in the files to correct that.
For this, you will need PrpShop and PlasmaShop, both under Tools.
PrpShop
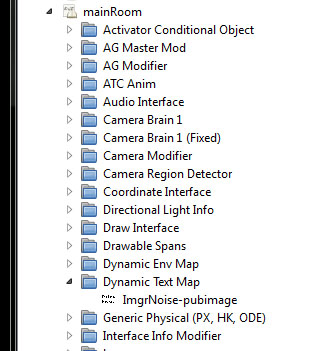
The next step will be to find our Dynamic Texture Map that was created in the export. In PrpShop, open the AGE file of your Age. This should load up the PRP files. Look under the PRP that has your imager (usually mainRoom by default). In it, find the Dynamic Tex Map folder. Under that should be the texture with Noise.
Right click on that and select Edit PRC. You should get a window with code looking like this:
Here, you will need to change the VisWidth and VisHeight from 512 to 1024. Once that's done, click Compile and Save. Next, click on the Save button near the upper left to save everything to your Age.
PlasmaShop
Note that if you try to go into your Age now, URU will crash. This is because offline URU needs a valid SUM file and we'll need to re-sum it for the Age to work properly. To do this, open Plasmashop and find your Age's SUM file in with the other files. Open it and in the next window, click Re-sum. Once that's done, close PlasmaShop. Your Age and imager should both work now!
Last steps
Again, you may have to redo the UV mapping to properly center your imager. Note that each time you'll do that, you'll have to re-export and use PrpShop and PlasmaShop once more to properly fix it.

