PyPRP:Footstep Decals
NOTE: This feature is not yet available in a release version of PyPRP. It is currently functional in the trunk version from the SVN, however, it's use and interface is subject to change without notice, and may be different at the time of release.
Contents
Introduction
Plasma has the ability to add footprint decals to visual surfaces that your avatar steps on. The only requirement for using this feature is setting up a material to represent a footprint.
Setting up the materials
The simplest way to do this is to create a hidden plane somewhere in your age, and texture it with a simple footprint texture. The texture should be partially transparent, and generally foot-shaped. It can be a simple dark mark, or a sandy imprint like those found in Minkata.
You can make your footprint texture quite small, a texture 128x64 pixels will give you plenty of detail (if you want detail).
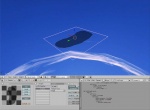
Make the background totally transparent and the footprint partially transparent (depending on how "strong" you want the footprint to appear). A detailed footprint should look something similar to this:
Once you have created and named this material in blender, you simply need to set up the footprint manager.
Scripting
Add the following script to any object, for instance, one of the surfaces you intend to have footprints on. Fill in the blanks with the name of the material you created, and the names of all the objects you want footprints to appear on in the targets list.
<object name>:
    logic:
        actions:
         - type: footmgr
           footmgr:
               matpreshade: <material ref>
               matrtshade: <material ref>
               targets:
                - <scnobj ref>
                - <scnobj ref>
Activator surfaces
Non-Waveset Surfaces
Puddles are used to create the ripples in water caused by the avatar walking through a surface. To add them, either add the water plane the "targets" list, or, if you are using a waveset; see below. The material references should point to a circular ripple material, or whatever sort of disturbance you want the avatar to make on the water's surface.
To make your avatar ripple texture have the spreading-out effect set 'initu', 'initv', 'finalu' and 'finalv'. To make your ripple texture not tiled-looking go to the 'texture' settings in the buttons window for the ripple texture and select the 'clip' button.
The numbers added to the init and final vars are times that the texture is tiled. So a good values to start with would be 'initu: 4', 'initv: 4', 'finalu: 1' and 'finalv: 1'.
Puddles also allow for "wet feet" effects, where walking through the puddles will cause you to have footprints for a short period of time. The puddle surface will be the activator. When you walk through it, making ripples, the puddle will trigger the footmgrs in the "notifies" list. You will also need to set "waitenable: 1" in the footmgrs you want activated this way, which will stop them from being on by default.
<object name>:
    logic:
        actions:
          - type: puddlemgr
           puddlemgr:
               matpreshade: <material ref>
               matrtshade: <material ref>
               targets:
                 - <puddle surface>
               notifies:
                 - <footmgr ref>
               initu: <initial size of puddle in U-axis>
               initv: <initial size of puddle in V-axis>
               finalu: <final size of puddle in U-axis>
               finalv: <final size of puddle in V-axis>
Waveset Surfaces
Use the same method as you do to create the puddle materials.
Then use "ripplevsmgr" instead of the "puddlemgr" and add a ref for your waveset object.
<object name>:
    logic:
        actions:
          - type: ripplevsmgr
           ripplevsmgr:
               matpreshade: <material ref>
               matrtshade: <material ref>
               targets:
                 - <waveset surface>
               notifies:
                 - <footmgr ref>
               waveset:
                 - <waveset ref(same name as waveset surface)>
               initu: <initial size of puddle in U-axis>
               initv: <initial size of puddle in V-axis>
               finalu: <final size of puddle in U-axis>
               finalv: <final size of puddle in V-axis>


