Difference between revisions of "Ahra Pahts:Getting Started"
(Created page with "{{Tutorial}} This tutorial will help you get started with Ahra Pahts Shell creation. '''COMPLETELY DELETE:''' * [http://www.guildofwriters.org/wiki/Pahts_Blender_Basics_F...") |
(→Link-in Points: tell people where they find their LIP number) |
||
| (6 intermediate revisions by 2 users not shown) | |||
| Line 1: | Line 1: | ||
{{Tutorial}} | {{Tutorial}} | ||
This tutorial will help you get started with [[Ahra Pahts]] Shell creation. | This tutorial will help you get started with [[Ahra Pahts]] Shell creation. | ||
| − | |||
| − | |||
| − | |||
== Prerequisites == | == Prerequisites == | ||
It is not assumed that you have a high level of modelling or technical experience. At the very least, you will need: | It is not assumed that you have a high level of modelling or technical experience. At the very least, you will need: | ||
| + | * [[Ahra Pahts]] (can be easily installed with [[UAM]]). | ||
* A working [[PyPRP:Installation|PyPRP installation]]. | * A working [[PyPRP:Installation|PyPRP installation]]. | ||
* [[PlasmaShop]]; make sure to point it to your Ahra Pahts installation folder (Games > Edit Games and browse with the Add Game button). The name chosen is up to you. Choose the game type too (most likely "Uru:PotS/CC"). | * [[PlasmaShop]]; make sure to point it to your Ahra Pahts installation folder (Games > Edit Games and browse with the Add Game button). The name chosen is up to you. Choose the game type too (most likely "Uru:PotS/CC"). | ||
| − | * [[Offline KI]] | + | * [[Offline KI]]. |
* Basic experience with Blender. This [http://en.wikibooks.org/wiki/Blender_3D:_Noob_to_Pro Wikibook] is a very good reference. You should read at least the first few chapters. | * Basic experience with Blender. This [http://en.wikibooks.org/wiki/Blender_3D:_Noob_to_Pro Wikibook] is a very good reference. You should read at least the first few chapters. | ||
| Line 90: | Line 88: | ||
=== Texturing the Hill === | === Texturing the Hill === | ||
| − | [[File:Grassy Knoll 1.jpg|200px|right|Your Shell as seen from outside.]]The next step is to texture this currently invisible hill. The basic method is the same.[[File:Grassy Knoll 4.jpg|200px|left|Your Shell as seen from inside.]] | + | [[File:Grassy Knoll 1.jpg|200px|thumb|right|Your Shell as seen from outside.]]The next step is to texture this currently invisible hill. The basic method is the same.[[File:Grassy Knoll 4.jpg|200px|thumb|left|Your Shell as seen from inside.]] |
# Press "7" on the keypad and press "a" to reset everything. | # Press "7" on the keypad and press "a" to reset everything. | ||
# Press the "1" above the letters to switch to the first layer. Change to edit mode and make sure nothing is selected. | # Press the "1" above the letters to switch to the first layer. Change to edit mode and make sure nothing is selected. | ||
| Line 108: | Line 106: | ||
# To simplify things, you should move the cube to its own layer now that it's positioned correctly. Select the cube, press "m" use the [[Media:Change Layer Pop Up.png|layer changing pop-up]] to select the right hand button of the top row before pressing OK. Your cube is now at layer 10; switch to it now (the "0" key above your letters). | # To simplify things, you should move the cube to its own layer now that it's positioned correctly. Select the cube, press "m" use the [[Media:Change Layer Pop Up.png|layer changing pop-up]] to select the right hand button of the top row before pressing OK. Your cube is now at layer 10; switch to it now (the "0" key above your letters). | ||
# On [[Media:Button Select1.png|your toolbar]] (by default, the one at the bottom), click on the [[Media:Button Select2.png|grey sphere button]], then click on the red sphere button. Click "Add New" in the new menu panel. Your tool bar should now look like [[Media:Ooo Buttons.png|this]]. | # On [[Media:Button Select1.png|your toolbar]] (by default, the one at the bottom), click on the [[Media:Button Select2.png|grey sphere button]], then click on the red sphere button. Click "Add New" in the new menu panel. Your tool bar should now look like [[Media:Ooo Buttons.png|this]]. | ||
| − | # Under the "Material" tab play with the "R", "G" and "B" sliders to change the color of the sphere to your left. This tutorial will use a green color. Choose a color you like. You can also use the buttons to the right of the sphere to change its primitive shape. | + | # [[File:Lacks texture.jpg|thumb|right|200px|Your cube as it would appear in Uru now.]]Under the "Material" tab play with the "R", "G" and "B" sliders to change the color of the sphere to your left. This tutorial will use a green color. Choose a color you like. You can also use the buttons to the right of the sphere to change its primitive shape. |
# In the same area where you clicked on your greyed out sphere, click on the little [[Media:Button Select3.png|pac man icon]] which opens up [[Media:Pac button screen.png|this button screen]]. To add physical properties to your cube, click on the "Bounds" button to obtain [[Media:Bounds button selected.png|this]]. | # In the same area where you clicked on your greyed out sphere, click on the little [[Media:Button Select3.png|pac man icon]] which opens up [[Media:Pac button screen.png|this button screen]]. To add physical properties to your cube, click on the "Bounds" button to obtain [[Media:Bounds button selected.png|this]]. | ||
# Use the [[Media:Bounds pop up.png|drop down button]] and select the "Static TriangleMesh". | # Use the [[Media:Bounds pop up.png|drop down button]] and select the "Static TriangleMesh". | ||
| Line 118: | Line 116: | ||
== Testing == | == Testing == | ||
| − | [[File:Copper Ore.jpg|200px|right|Your Shell as it appears with the final cube.]] It's now time to link into your shell to test. | + | [[File:Copper Ore.jpg|200px|thumb|right|Your Shell as it appears with the final cube.]] It's now time to link into your shell to test. |
# Make sure you have the latest version of Ahra Pahts installed. | # Make sure you have the latest version of Ahra Pahts installed. | ||
# In Blender, choose Export > PyPRP and choose "All as full Age, per-page textures (.age)". | # In Blender, choose Export > PyPRP and choose "All as full Age, per-page textures (.age)". | ||
| Line 132: | Line 130: | ||
# Use your Offline KI to link to Ahra Pahts (<code>/link Pahts</code> in the KI). | # Use your Offline KI to link to Ahra Pahts (<code>/link Pahts</code> in the KI). | ||
You can now admire the splendour of your Shell. | You can now admire the splendour of your Shell. | ||
| − | |||
=== Link-in Points === | === Link-in Points === | ||
| − | A '''LIP number''', or Link-In Point number refers to the link-in point for the linking book outside your shell. To use it, you need to know your shell's number | + | A '''LIP number''', or Link-In Point number refers to the link-in point for the linking book outside your shell. To use it, you need to know your shell's number, which you can find in the [[Ahra Pahts:Shells#Sign Up Table|Sign Up Table]]. To quickly link to it, type this command into your KI. |
/linksp Pahts lpc'''xxx''' | /linksp Pahts lpc'''xxx''' | ||
If you want a more permanent link, you can add a book to your bookshelf [[Offline KI:Technical Documentation|described here]] using this definition: | If you want a more permanent link, you can add a book to your bookshelf [[Offline KI:Technical Documentation|described here]] using this definition: | ||
Latest revision as of 04:09, 5 May 2012
| This is a tutorial page. |
This tutorial will help you get started with Ahra Pahts Shell creation.
Prerequisites
It is not assumed that you have a high level of modelling or technical experience. At the very least, you will need:
- Ahra Pahts (can be easily installed with UAM).
- A working PyPRP installation.
- PlasmaShop; make sure to point it to your Ahra Pahts installation folder (Games > Edit Games and browse with the Add Game button). The name chosen is up to you. Choose the game type too (most likely "Uru:PotS/CC").
- Offline KI.
- Basic experience with Blender. This Wikibook is a very good reference. You should read at least the first few chapters.
Preparing
You'll need to set up your work environment properly before you can begin working on your very own Shell for Ahra Pahts.
Signing Up
The first thing you'll need to do is to register for an empty Shell on this forum thread. You should then update the associated wiki article with your reserved Shell information. Within a few days of registration, you should also get a PM from Robert the Rebuilder with a link to a Shellxxx.blend file (where xxx is the number of your chosen shell) and a zipped file called texture.zip.
What You Get
The Shellxxx.blend file you received contains 16 objects spread across 3 layers (where xxx, here and for the rest of this article, is your Shell number).
Note: if you open your Blender, make sure to press a and then Shift+C to center your screen on your objects, which are positioned relatively to a reference point to fit in with all the other shells. Press a again to unselect all the items you previously selected.
Layer1: Shell Walls
This layer contains the visible external walls of your Shell. These objects are textured to give a consistent look and feel.
-
xxxtop: the top of the external wall. -
xxxflr: the floor skin used to carry the grass floor texture. -
xxxwal: the external wall. -
xxxstr: the short stairway at the doorway. -
xxxLitShFrnt2.001: the two lights on either side of the doorway. -
xxxCrn: the external corner stones for the Shell.
Layer2: Lights and Collision Objects
This layer contains various lights and physical surfaces. The first two objects are light emitters:
-
xxxLitShFrnt1: the light source to the left of the doorway. -
xxxLitShFrnt2: the light source to the right of the doorway.
The next four represent the physical surfaces you walk on the doorway to the Shell:
-
xxxStrCOL: a collision detect box. -
xxxFootStpStr: the slope of the steps. -
xxxFootStpFlr2: the curb to the left of the doorway stairs. -
xxxFootStpFlr3: the curb to the right of the doorway stairs.
The last three represent the physical surfaces of the floor and the walls:
-
xxxFootStpTop1: the top of the wall. -
xxxFootStpFlr: the bottom of the wall. -
xxxFlrCOL: the floor surface you walk on. Note that this is not the one painted as grass.
Alt Layer2: Shell Number Plaque
The last layer contains only one object:
-
xxxNumber: the plaque above the doorway that displays the door number for your Shell.
Texture files
You received, along with the Blender file, a pack of textures comprised of seven .tga files:
-
LightSh1.tga: the light fittings either side of the doorway. -
ShCrn.tga: the external corner stones of the shell. -
ShFlr.tga: the Shell floor (grass). -
ShNumbers.tga: the digits used to generate the number of your Shell above the doorway. -
ShStr.tga: the texture used to paint the short reach of steps into your Shell. -
ShTop.tga: the top of the external wall. -
ShWal.tga: the face of the external wall.
Setting Up Your Workspace
A workspace is an organized place for all of the necessary files. This includes textures, the blender files, sound files, SDL files, and scripts; in short, all of the components of an Age, organized so that they can easily be put together. An organized workspace will help prevent potential problematic situations, such as broken absolute paths and so on.
- Create a location on your computer for all your Ages, such as
My Documents\Ages. For Ahra Pahts, you would then create a subfolder calledPahts. - Copy your Shell files (those described above) into this folder; the
.blendfile goes in thePahtsfolder, whereas the textures should be extracted toPahts\textures. - Create additional folders as needed:
-
Pahts\soundsfor all your.oggsound files. -
Pahts\scriptsfor all your.pyPython files. - If you have an SDL file, put it in the same folder as your
.blendfile. - Textures should go in the
Pahts\texturessubfolder.
-
Please note that you might want to create a separate Export folder to export your Age to from Blender.
You are now ready to begin editing.
Note: is is highly recommended that you make a backup now of you empty Shell.
Modifying the Floor
It's now time to start making actual changes to your Shell.
Adding a Hill
The first thing you'll do is add a small hill to your Shell.
- As an optional step, you can move the two floor sections to layer of their own, which will make modifying them easier. The floor objects,
xxxFlrCOL(made of four polygons) andxxxFlr(made of twenty-five polygons and with the grass texture) make for a low polygon count which is important, considering Ahra Pahts consists of 150 Shells. It's good advice to try to keep the polygon count always as low as possible. - Switch to the second layer by clicking on the second square from the left as highlighted in this screenshot.
- Right-click in the centre of the floor and press the Tab key to switch to edit mode. If it's not purple as indicated in this screenshot, press the "b" key ("b" for box) and drag a selection box over the shell. Only the floor should be selected.
- Subdivide three times the selected floor. This will significantly increase the polygon count, providing more flexibility with the floor.
- Press "a" to deselect the floor, then place the cursor somewhere in the middle of the floor and press "b". Left click and drag inside the boundary of the floor; it should look something like this with some of the vertices selected.
- Using the numeric keypad (not the number keys above the letters, which switch between layers), assuming you have one, press the "1" key with your cursor on the main screen. You should now be able to view your floor from the side.
- Click on the blue arrowhead and drag up until some of the floor appears just beyond the wall. Don't make the slope too stepp, or you won't be able to climb your hill.
Texturing the Hill
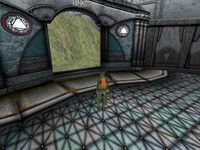
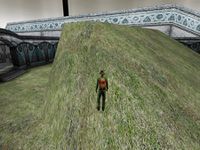
The next step is to texture this currently invisible hill. The basic method is the same.- Press "7" on the keypad and press "a" to reset everything.
- Press the "1" above the letters to switch to the first layer. Change to edit mode and make sure nothing is selected.
- Hold down Shift then right-click in turn on each vertex until your screen looks like this.
- Subdivide three times.
- Select a small area as before.
- Press "3" on your keypad to switch to the side view. Raise the floor as before. Make sure it matches your previous modification.
The end result can be seen to the sides.
Adding a Cube
As an alternative project, you could add a cube to your shell. Make sure you're using a clean backup of your Shell before proceeding. Incremental saves are also recommended, with a different file for each save.
- Position yourself to the side of your Shell (press "1" on your keypad). Move the crosshair cursor (by left clicking on and off) around to the location of the object you want to create, somewhere in the centre of the floor. Make sure it's slightly above ground level, otherwise the object will be buried. It does not matter which layer you are using but for clarity you should use the second layer ("2").
- Whilst in the 3D view, press the spacebar to get a pop-up menu. You need to Add a Cube. A cube shall be created at the location of your crosshair cursor.
- Press the "s" key ("s" for scale), then the number "3", then Enter. This will enlarge your cube (as seen in the screenshot in the top left corner, where the numbers represent the increase in size). Press Enter to exit the scale tool.
- From the side view, use the blue arrow to move the cube around to rest on the floor of your Shell.
- To simplify things, you should move the cube to its own layer now that it's positioned correctly. Select the cube, press "m" use the layer changing pop-up to select the right hand button of the top row before pressing OK. Your cube is now at layer 10; switch to it now (the "0" key above your letters).
- On your toolbar (by default, the one at the bottom), click on the grey sphere button, then click on the red sphere button. Click "Add New" in the new menu panel. Your tool bar should now look like this.
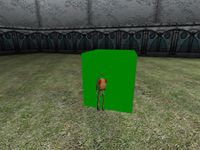
- Under the "Material" tab play with the "R", "G" and "B" sliders to change the color of the sphere to your left. This tutorial will use a green color. Choose a color you like. You can also use the buttons to the right of the sphere to change its primitive shape.
- In the same area where you clicked on your greyed out sphere, click on the little pac man icon which opens up this button screen. To add physical properties to your cube, click on the "Bounds" button to obtain this.
- Use the drop down button and select the "Static TriangleMesh".
- It's now time to add a bit of texture to your cube. Download this rock texture file into your textures folders.
- Click once more on the greyed-out sphere and then on one with the skin of a leopard on it. Click the "Add new" button to get this.
- Under "Texture Type" select "Image". You will now have an Image panel Use the "Load" button to select your texture file. Your bottom toolbar should now look like this.
- Switch to Edit mode now (press the Tab key). In the 3D View, hit the "u" key to get the UV Calculation pop up. Select the "Unwrap" option with your cube selected.
- You now need to assign a page number to your cube. Click on the pac man button again. Click on the "Add Property" button to get this. Change the parameters to match this screenshot, where "xxx" is of course your shell number.
Testing
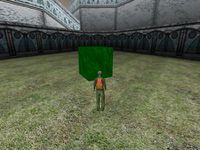
It's now time to link into your shell to test.- Make sure you have the latest version of Ahra Pahts installed.
- In Blender, choose Export > PyPRP and choose "All as full Age, per-page textures (.age)".
- Choose a temporary directory. Do not overwrite your Ahra Pahts
datdirectory. Save it asPahts.ageand click the "Export .age" button. Make sure no error arise in the Blender console. - Copy your Shell's file (e.g.
Pahts_District_Shell111.prpfor shell 111) to your Uru installation'sdatfolder, overwriting your preexisting Shell PRP. - If your shell has any Python files:
- Copy them into the
Python/Srcdirectory of your Uru installation (if you do not have aSrcsubdirectory, create one). - Start PlasmaShop.
- Expand the Python folder, then double-click the
Pahts.pakfile to bring up a dialog. - Click on the "Add files..." button
- Select the Python files you copied here earlier and click OK. It will compile them and add them to the PAK file.
- Exit PlasmaShop.
- Copy them into the
- Use your Offline KI to link to Ahra Pahts (
/link Pahtsin the KI).
You can now admire the splendour of your Shell.
Link-in Points
A LIP number, or Link-In Point number refers to the link-in point for the linking book outside your shell. To use it, you need to know your shell's number, which you can find in the Sign Up Table. To quickly link to it, type this command into your KI.
/linksp Pahts lpcxxx
If you want a more permanent link, you can add a book to your bookshelf described here using this definition:
age:Pahts,lpcxxx


