Difference between revisions of "Painting stencils"
(Stencils! Err.. summary? Uhm... guess I made this page. ;)) |
m (Fix metadata.) |
||
| (One intermediate revision by one other user not shown) | |||
| Line 20: | Line 20: | ||
| − | This is a quick tutorial at someone's suggestion | + | This is a quick tutorial at someone's suggestion. ~Lontahv |
| + | |||
| + | [[Category:PyPRP]] | ||
Latest revision as of 09:24, 4 March 2020
Ok, we all know (ok at least most of us) how to make stencils with those little crazy build-in textures.
Now, here's the method I use for my stencils (at least for ground blending).
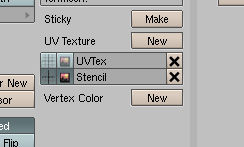
First make another UV Layer and call it something like "Stencil" and select to have that one shown.
Then unwrap this texture's layer with "Unwrap" option. Then go to the UVEditor and map the texture--like you would with any other texture only that this time make a new texture (lets try 512x512) in this case use the smallest texture you can get away with. Remember that no part of the UV mapping should be overlapping (no tiling either).
Now go back to your 3dView. Your object should look jet black.
Here comes the fun part:
Go into TexturePaint-mode in the same mode-selector as you go into VertexPaint-mode with. Now get a white brush and paint where ever you want there to be your certain texture (so for a strip of grass paint a strip of white). Now, go back into the UV mapping window when you're done and save the resulting image (don't save it over anything!--this can be easier than you think so be careful). Then use this image as a stencil layer with the mapping of UV Layer "Stencil".
Note:
This tutorial is dependent on you knowing basics of stenciling and UV mapping. If you want to use this tutorial and don't know these things this is a good tutorial about stencils: Using_stencils
This is a quick tutorial at someone's suggestion. ~Lontahv

