Korman:Materials
| This is a tutorial page.Versions available: PyPRP; 3ds Max; Korman. |
This tutorial will explain the basics of Blender's materials and how they'll export with Korman.
Contents
Introduction
Any object that you would like to be visible in Korman should have a material. If it's a region, clickable, or anything else you would rather not have visible, materials are not needed. With PyPRP, this would break the export if the object wasn't specifically set as a region or collider, but with Korman, that is not a problem.
The material of an object is essentially the base, or if you add textures, the "underbelly" of the object. If you'd prefer your object to be a solid color with no detail, you can use just a material. Otherwise, if you want textures, you start first with a material.
An object can also have multiple materials, with each one set to a specific face (or faces) of an object if you so choose. Also, if you join two or more objects, all materials (and their mapping) are carried over, or in the case of shared materials, merged.
Materials In Blender
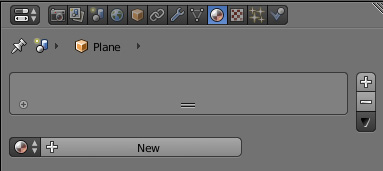
To add a material to an object, first select the Material button in the Properties window.
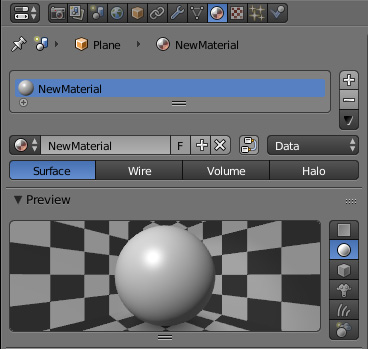
Next, press the + to add a new material. Name it anything you'd like.
Remember that you can add many materials to the same object. Each can have its own textures.
To assign specific faces to each different material, press the Tab key in 3D View to bring up Edit Mode. You will see three new buttons just below the list of materials:
- Assign: This will set any selected face to the selected material.
- Select: This will highlight any face associated with the selected material.
- Deselect: This will unhighlight any face associated with the selected material.
Press Tab again to exit Edit Mode.
Material Options
Diffuse
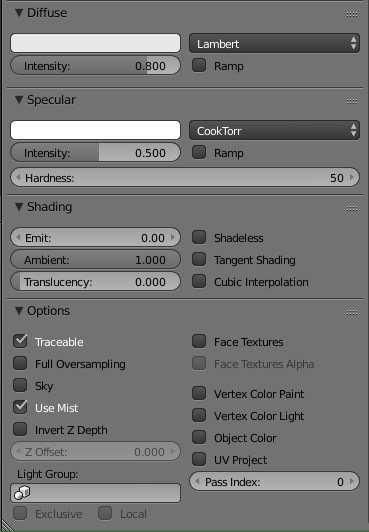
This is the "base" color of your object. Generally, this is set to white, but if you'd like to set your object to have a specific tint, you can change this color to something other than white. This color will be combined with the color of any textures used with this material.
If you'd like your material to show up a bit darker with no tint, you can use a shade of grey.
Leave Lambert alone and leave Ramp unchecked. These settings are not used by Korman.
NOTE: As of Korman 0.11a, the diffuse color can be animated.
Specular
This option controls the "shine" based on your light sources. This is not the same as a reflection, but it adds a touch of realism to metallic objects. By default, specular effects are not applied to any textures, but you can enable it on a per-texture basis. Don't go overboard though: specular lighting has a slight performance cost at runtime.
The color slider here controls what color the shine on your material will be. Typically it's safe to leave this as white.
Hardness is set to 50 by default, and is used to control the "spread" of the shine. A value of 100 will result in a very focused shine, while a value of 1 will light the object much more broadly. The default value of 50 is a reasonably safe choice for most materials.
Again, leave Intensity, CookTorr and Ramp alone.
Shading
Emit can be used to make your material appear brighter than it would normally be. It causes the material to be lit by the diffuse color, before other lighting is combined. The slider controls how brightly the diffuse color appears: The default value of 0 will cause the material not to add any additional brightness, while a value of 2 will cause the material to combine the full diffuse color.
Ambient is usually set to 1 while Translucency is 0, but these values are not used by Korman. Tangent Shading and Cubic Interpolation are also not used.
Shadeless, when checked, will cause the material to be lit with full brightness by a white color.
Options
Traceable should ALWAYS be checked.
Full Oversampling and Sky are not used.
Use Mist will determine if an object is affected by the fog set in your Age. If this is unchecked, an object with this material will appear clearly through the fog.
Invert Z Depth can be skipped.
Z Offset is used for very close-quarters objects. If two objects are overlapping, you may get clipping. You can set Z Offset to something above 0 to remedy this.
Light Group will set the material to only be affected by a certain light group during lightmapping or vertex shading and when exploring the Age.
All the check boxes to the right can be left alone (Face Textures through UV Project).
Pass Index is very important when organizing objects with transparency.
EXAMPLE: If you want transparent object A to sit above transparent object B without the alpha eating through the object below, object A should have a higher Pass Index than object B, ie Object A = 2 while object B = 1. Generally, new objects have a Pass Index of 0. If they're solid (no alpha), that should be fine. Otherwise, set transparent materials to Pass Index: 1 or above.
Shadow
Added as of version 0.07.
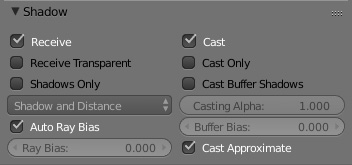
This panel controls how the material receives light. The default settings here are good enough for URU.
The one thing to note here is the Receive Transparent option. This option is needed for the material to receive shadows from meshes with textures that have transparency.
Now that our material is properly set, let's add textures!


