Korman:Exporting
| This is a tutorial page.Versions available: PyPRP; 3ds Max; Korman. |
This tutorial will cover the export options of Korman. To set up a basic test Age for export, you can follow the directions in the Getting Started tutorial.
Contents
[hide]Final Preparation
Now that we have an Age with all the basics, it's time to export!
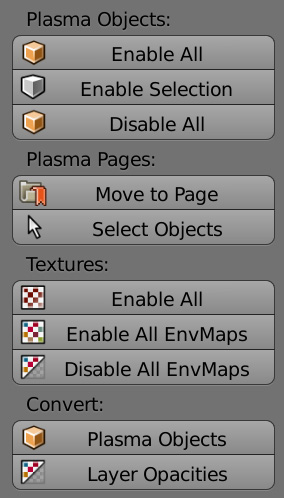
First, you want to make sure all objects will export. Open the Tools panel (T) in the 3D window and click the Tools tab. Under Plasma Objects, choose Enable All.
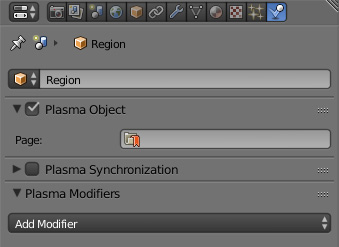
If you'd prefer something not be exported, you can choose it in the 3D window and uncheck Plasma Object in the Physics panel of the Properties window.
You can also activate and deactivate multiple objects at a time by selecting them and clicking Enable (or Disable) Selection.
Saving
Lastly, Korman needs the blend file to be saved to a location before it can export. Save the filename as anything you'd like as the Age Name field will export the proper Age filename at export.
If you don't save your file, Korman will give you an eyeful of error text!
Exporting
As of version 0.07, there are now two ways to export:
The Easy (Preferred) Method
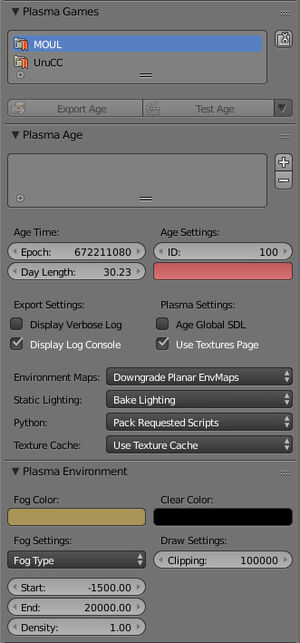
If you added your various versions of URU to the Plasma Games panel during the setting up phase, you should be ready to export using said panel.
Simply click on the version of URU you'd like to export. Next, there are a few options:
- Export Age: This will export the necessary files to Link to your Age.
- Test Age: This will do the same as Export Age, then boot up URU and Link directly to your exported Age.
For more options, click on the down arrow to the right of Test Age:
- Export Localization: This will only export the journals of your Age set in the Text Window and with the Journal Modifier.
- Export Python Scripts: This will only export your Python scripts chosen for export from the Text Window.
- Launch Age: This will boot up the selected installation of URU directly into your existing Age without exporting a new copy.
- Package Age: This will save a fresh export of your Age files into a ZIP file for easy distribution.
Note: Test Age and Launch Age will only work if you've set things up properly in user preferences.
The Original Method
At the top of the Blender window, click File->Export->Plasma Age (.age).
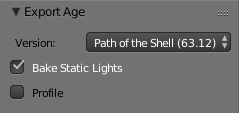
Bake Static Lighting will cause lightmaps and vertex lighting to be generated for you.
Profile is for debugging purposes.
In the new window, to the left, you can select which version of the game to which you are exporting, which include:
| Save Option | Description |
|---|---|
| Ages Beyond Myst | For the "URU Prime" version without To D'ni or Path of the Shell |
| Path of the Shell (Complete Chronicles) | For the most current offline URU |
| Myst Online: URU Live | For MOULa-based Shards (online)
|
NOTE: While the Original method will still work some people have had issues with Journals so if you have Journals it is probably advisable to use the new method.
The filename of your Age should also be fairly unique to avoid conflicts with other Ages. It's also best to keep it as one word with no spaces. Underscoring the name, like GuildPub_Writers, is also not a good idea as it may create problems with the Age's Python coding.
One string of letters and numbers, with no special characters or spaces, is the best way to name the AGE file.
Type in your filename of choice, with .age at the end instead of .blend. Save your Age into the dat folder of your chosen URU installation.
Barring any error messages, your Age should be ready to visit!
Visiting Your Age
In Path Of The Shell and Complete Chronicles (Offline)
For the offline version of the game, you will need to install the Offline KI into your URU installation.
Once that's installed, enter the game and type /link YourAgeName into the KI.
In Destiny Shard (Online) also generic Dirtsand shards
Destiny is a shard run by Mystler and Christopher. You can use it to test your Age in a MOULa/online type environment. This method also works if you are running your own MOUL shard with DirtSand or MOSS.
- To set up the client, read this Destiny forum thread.
- Once you have that properly set up, run the game and press the ~ key to bring up the Plasma console.
- Type
Net.LinkWithOriginalBook <YourAgeName> Default:<YourLinkInPoint>:;to Link to your Age. - Press the ~ key again twice to close the Plasma console.


