Materials and UV Editing in Max
Okay, for those of you use to using Blender, and have never used Max before, this part (among other things) can have you beating your head against the wall.
If you're like me, you were used to Blender where you selected your Mesh or Object, went to Edit mode, and in a split screen simply called up the UV Editor.
In Max it's a bit different.
First off, if you'd like to see some Video Tutorials on this, there is a link here for you. Some of the tutorials are blurry, or the narrator tends to ramble on a bit, but they can still help. However, these video tutorials will leave out a important step that is needed for Age Creation.
Getting Started....
Okay, I'm going to assume that you've created an object, and are done building it, and you want to apply a material and texture it.
If the object is simple and has a lot of flat planes, chances are you'll UV map it fine. If it is a bit more complex, you'll have to work with UV editing it a bit better.
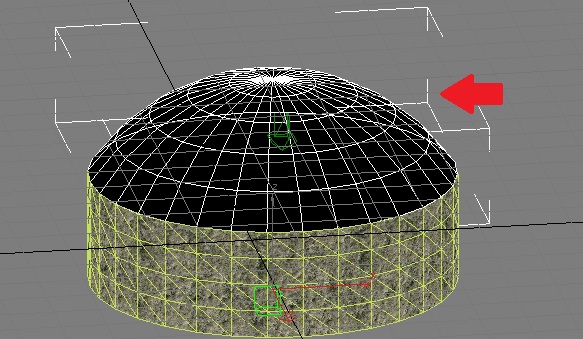
Here I have the roof of my little test Age room. It's dome shaped:
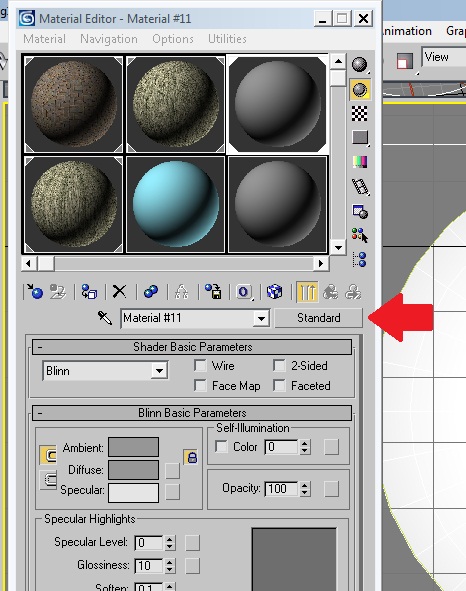
Now we need to add a material to it, so hit your "M" key to call up the Material Editor:
Select one of the grey spheres at the top (an "unused" material") and in the box where it says "Material #11" in my pic, you can rename it to something a bit more useful (I'm leaving mine default here). Then take a look at where my red arrow is pointing. The button says "Standard". We need to change this, so click on the button.
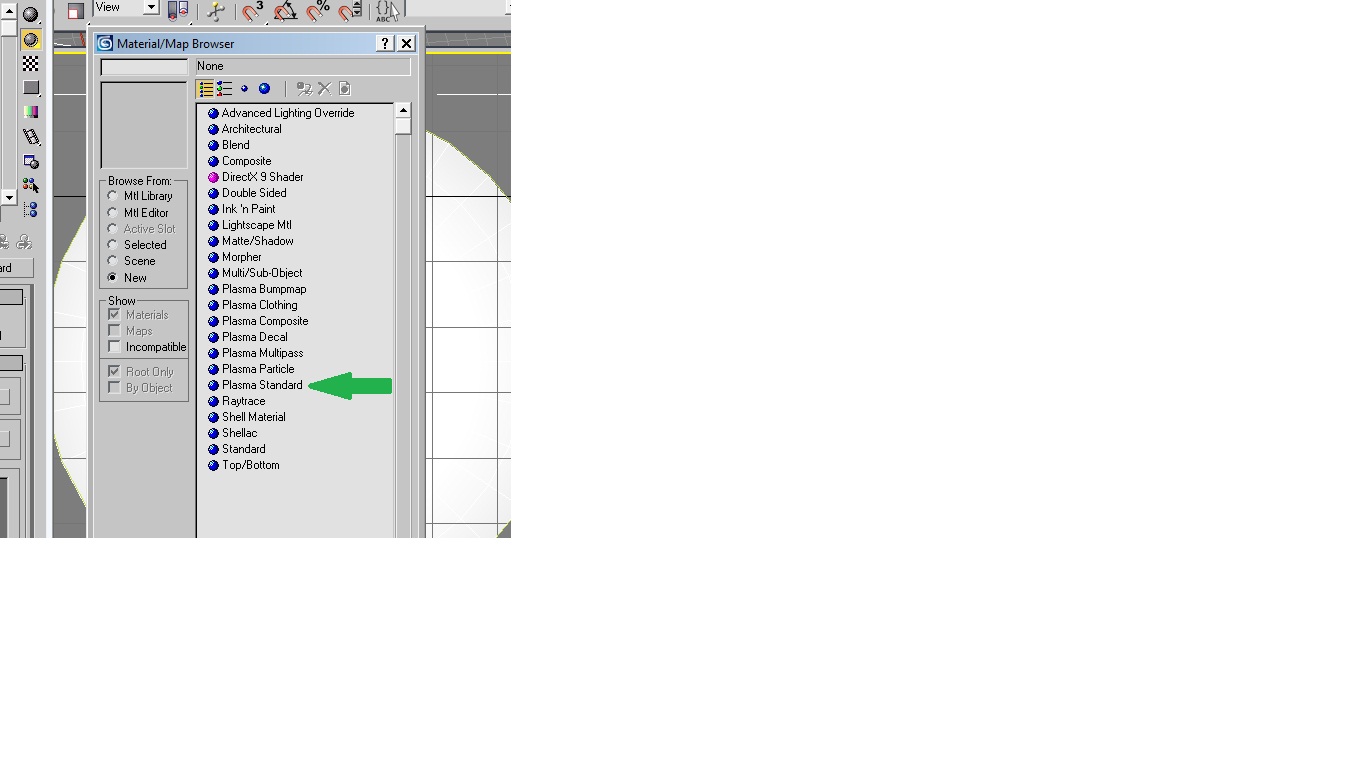
In this new box that pops up, you need to find and double click where it says "Plasma Standard"
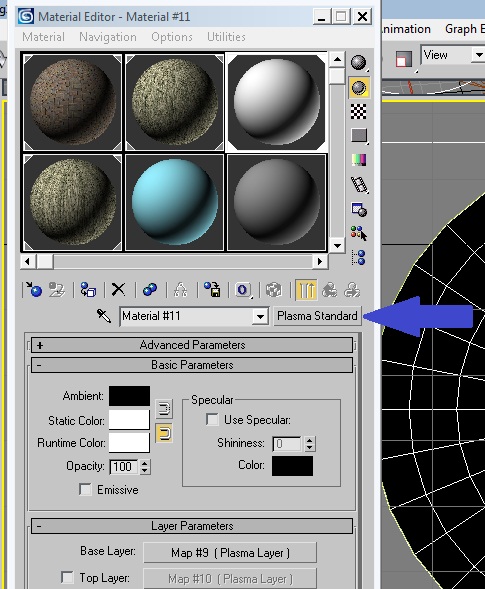
When you do, your Material Editor will reflect this change where my blue arrow is pointing:
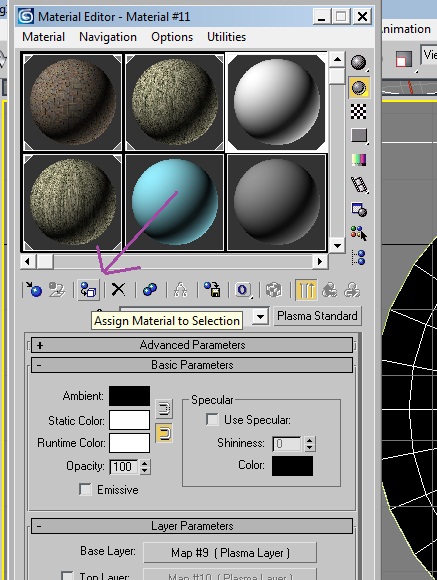
Now we need to assign this material to our object. You can do this 2 ways. You can go up, click, drag and drop the sphere from this window and on to your object in one of the graphics windows. Or you can just click on this button here, as long as you have the object selected:
As you can guess, you can mess with the Material Settings like you did in Blender.
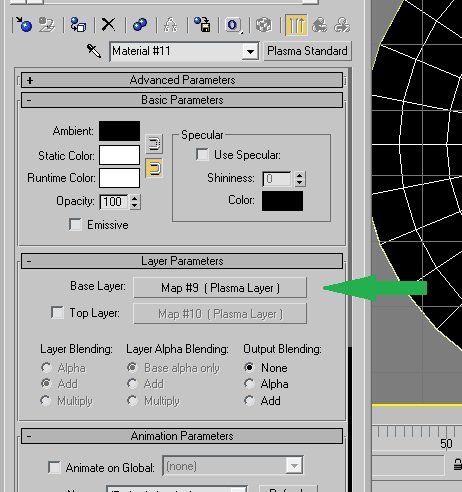
Now let's assign a texture to it. In Max, the "textures" will be called "Maps". Move down in the Material Editor until you are in "Layer Parameters" You want to click on the button where it says Base Layer:
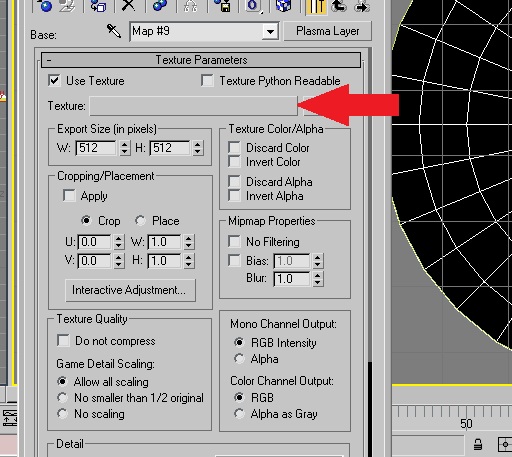
You are now in the Texture Parameters for that layer. This is like the "Texture Panel" in Blender. To assign a texture here, click in the blank box where I have my red arrow pointing:
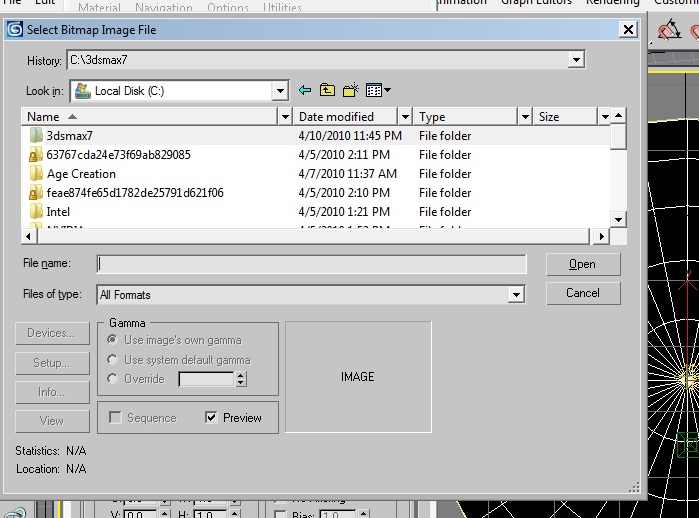
This will call up a directory tree where you can go select your texture file you want to use:
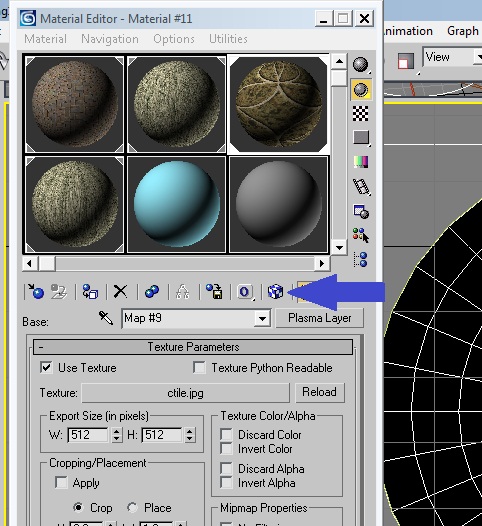
Now you may have noticed that we don't see the texture on your object in our graphics window. We need to tell Max we want to see it. Click on the little checkered box that I show in my pic below:
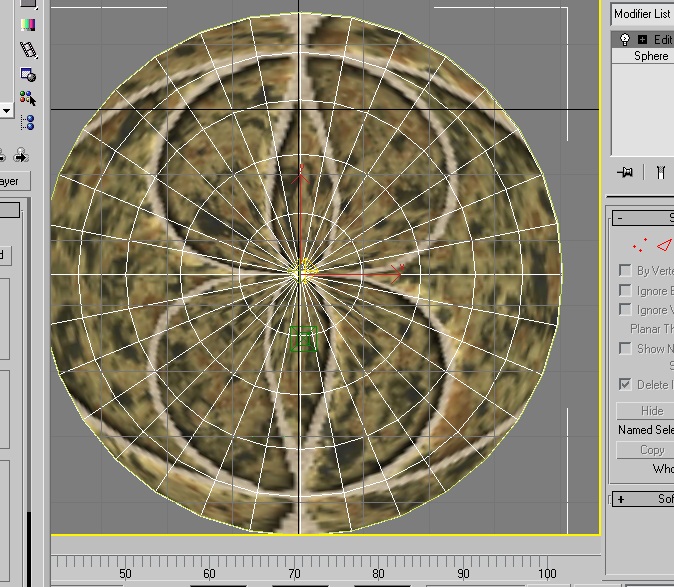
Now we can see the texture applied to the object. Unfortunately as we can see, it's not mapped right:
Now, if you are used to using Blender, you were most likely thinking that we go to "Edit Mode" and call up the "UV Editor" etc, etc. Well Max does things a bit different. It's important to get used to thinking in terms of "Modifier" Once you create an object in Max, basically from that point on, you will be applying a Modifier, after Modifier on it to make it into what we want.
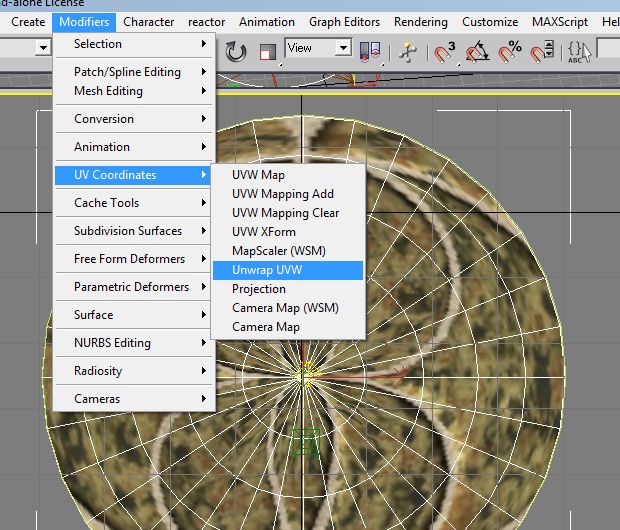
So with our object still selected, go up to the top menu and select "Modifier", then "UV Coordinates" and then "Unwrap UVW"
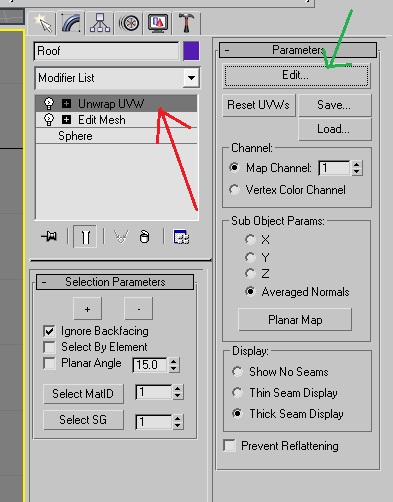
If we look over to our right, we'll see in our tools we have a new modifier added that says UVW Unwrap (where my red arrow is pointing in the pic below). Make sure it's selected, and you should also see under "Parameters" a button called "Edit" (where my green arrow is pointing). Click on that button:
Once you click on that button, you should have a new window pop up:
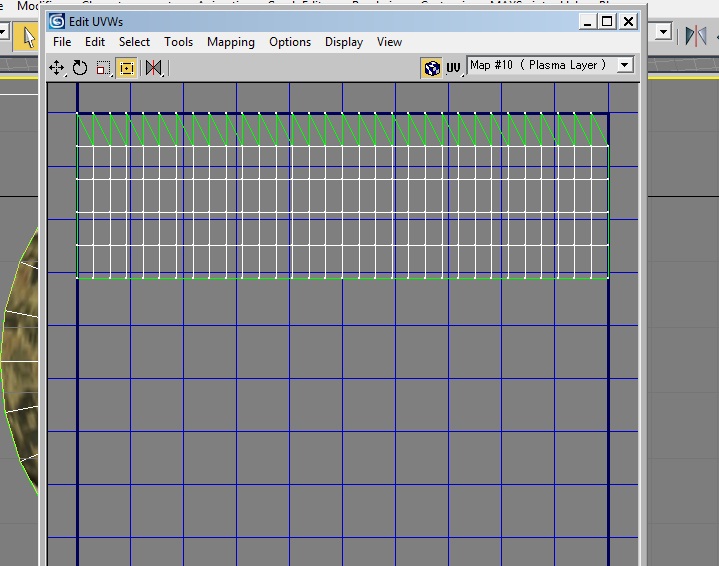
THIS is the "UV Editor" window that us Blender users are used to (I can hear you all going "oooooo" and "aaaahhhhhh!").
Now we can see how the faces have been unwrapped. You can play around in here to get your faces unwrapped the way you want them. For now, I'll show you how to use "Flatten"
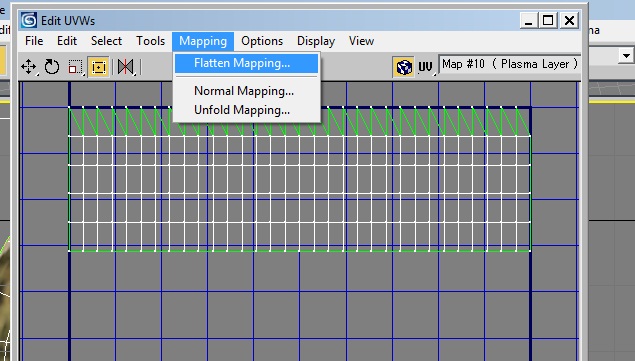
Go up to "Mapping" in this window and click on Flatten Mapping:
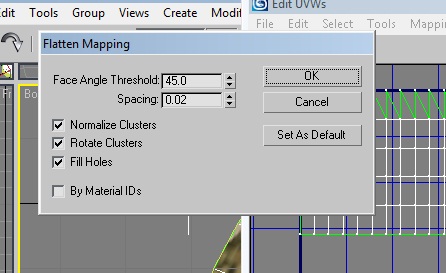
A new little box with mapping parameters will pop up. I just leave them defaulted and click on "Okay"
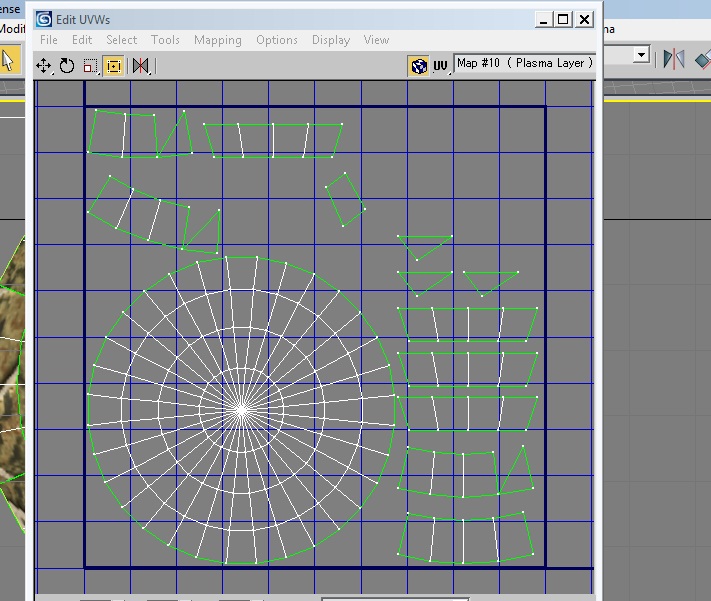
Now you can see how it unwrapped my dome:
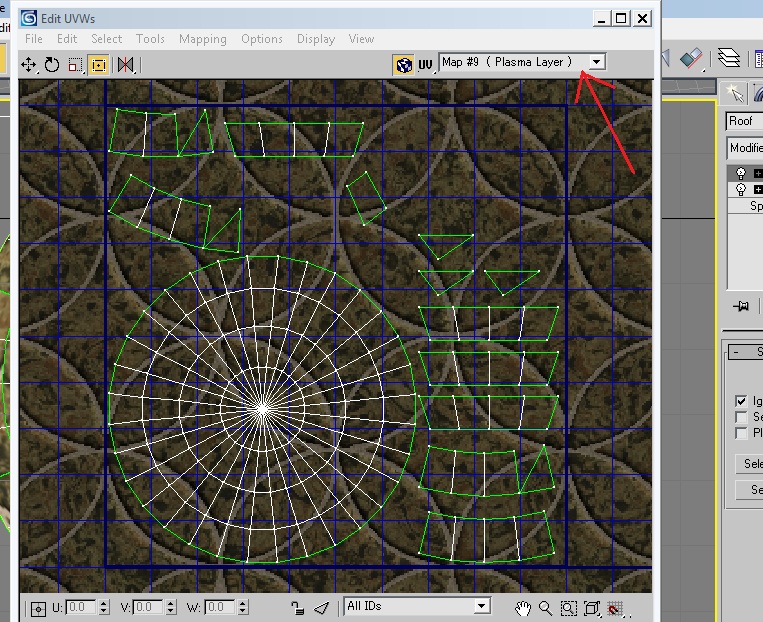
Now I'll apply my texture to the UV Map. Go up to the drop down box in the upper right hand side and select the Map Layer that we assigned our texture to. And then you should see the texture in your UV Mapping window here:
There you go! Now you can select faces, scale, rotate, move around, all the stuff you need to apply your texture to your faces.
Hope this helped.
Return To: 3DS Max and Plasma Plugin tutorials.

