Difference between revisions of "Korman:GUI Note Popup"
m (just did some spacing out) |
|||
| Line 111: | Line 111: | ||
* '''GUI Page''': Selects the GUI PRP. If this is blank, then the PRP itself isn't set properly (see [[Korman:GUI Note Popup#Adding_a_New_PRP|earlier section]]). | * '''GUI Page''': Selects the GUI PRP. If this is blank, then the PRP itself isn't set properly (see [[Korman:GUI Note Popup#Adding_a_New_PRP|earlier section]]). | ||
| − | |||
* '''GUI Camera''': Choose the camera you'd like to use when viewing the GUI object. The camera ''must'' be set to the GUI Page or it will not appear. If one is not selected, Korman will create one for you. | * '''GUI Camera''': Choose the camera you'd like to use when viewing the GUI object. The camera ''must'' be set to the GUI Page or it will not appear. If one is not selected, Korman will create one for you. | ||
| − | |||
* '''Clickable''': If you'd prefer to reference a different object to be the clickable, you can set the object here. | * '''Clickable''': If you'd prefer to reference a different object to be the clickable, you can set the object here. | ||
| − | |||
* '''Clickable Region''': Sets the region surrounding the clickable. If this is left blank, Korman will create one for you. | * '''Clickable Region''': Sets the region surrounding the clickable. If this is left blank, Korman will create one for you. | ||
Latest revision as of 19:14, 13 November 2024
| This is a tutorial page.Versions available: PyPRP; 3ds Max; Korman. |
This tutorial will show you how to properly setup a non-journal/Linking Book popup.
Contents
[hide]Introduction
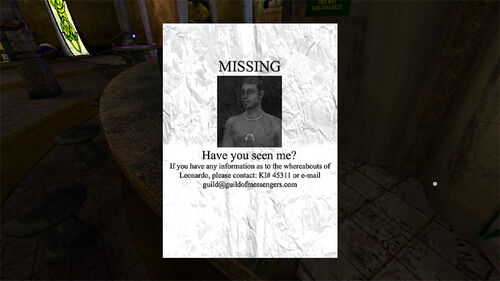
Graphical User Interfaces (or GUIs) popups are for when you click an item for a closer view This is used for a few items in Cyan's Ages, such as certain notes, maps, drawings and photos.
Examples are sketches on Sharper's desk in the Baron's city office or notes on the Tokotah rooftop in Ae'gura.
GUIs can also be animated. One example of this is the rain Relto page in the cleft.
Setting up the GUI
Adding a New PRP
To start, we want to add a new, separate PRP for the GUI objects.
To do this, click to the World tab in your Properties window.
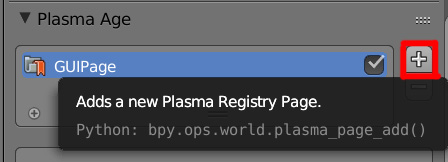
Scroll down to the Plasma Age panel and click the + to the right:
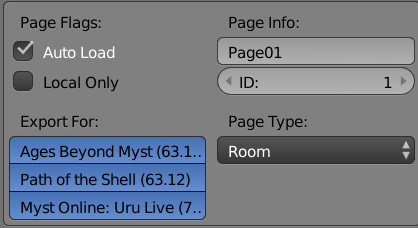
A new panel will appear below the PRP list that looks like this:
Under Page Info:, name the new PRP something unique. If you'd prefer the Page ID to be something other than the created default, you can do that too. It's recommended to use the default, however.
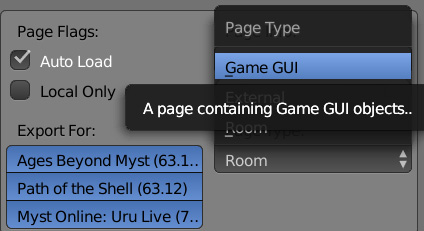
Next, for Korman to recognize this PRP as a GUI Page, we need to go to the drop down menu under Page Type:.
The default is Room, which a majority of your Pages will be. For a GUI Popup, however, we need to switch this particular page, and any GUI page, to Game GUI in the drop-down menu:
The PRP is now ready to be setup.
Adding GUI Objects
You will only need one object set to your GUI Page: the textured object itself.
You can also add a camera object to fine-tune the view of your GUI object. Otherwise, Korman will create one for you with default settings.
NOTE: Make sure both objects are put in a place not normally viewed while in the Age, such as under a floor or behind land meshes.
Adding Your Own Camera
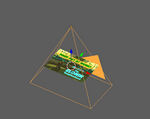
If you add your own camera object, be sure it is orientated properly to the GUI object and a proper distance away.
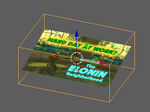
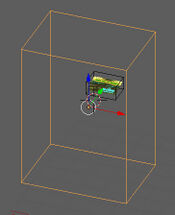
To the right is an example of how it typically looks in Blender. As shown, the GUI object is inside the rectangular "frame" of the camera.
This should cause the object to fill most of your screen when it comes up in-game.
Adjust the camera's Z-position as needed after your first export.
Set Objects to Correct Page
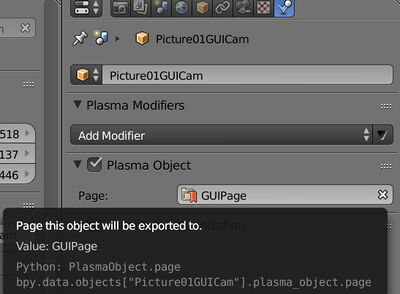
Lastly, make sure your GUI object and camera (if applicable) is set to your GUI Page.
Go to the Physics tab, then look to the Plasma Object panel.
Make sure the Page is set to the GUI Page created earlier.
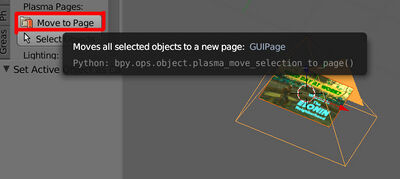
Alternately, you can use the Move to Page option in the 3D View Tool Shelf (Press T in your 3D View window if it's not there).
Select the objects you'd like to move to the GUI page by holding Shift and right-clicking on the appropriate object(s).
Finally, click the Move to Page button and select your GUI Page from the list.
Setting Up the Clickable
Next, we'll setup the clickable object itself.
One thing to remember is that the clickable should not be a flat plane. This will cause the URU client to crash in most cases.
Instead, we will use an invisible clickable rectangle that encompasses the textured plane.
First, you'll want to add the actual plane object with the image, note, etc. for the GUI. Cyan usually used smaller versions of the GUI texture for the in-world textured object, but this is not necessary.
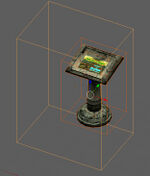
Next, let's add the actual clickable rectangle and adjust the scale so it surrounds the textured plane like so:
This step is optional, as Korman will create one for you if not specified, but you can also add a region that will activate the clickable when you step into it:
This should be enough to wire up your GUI and its clickable.
Adding the GUI "Note Popup" Modifier
For this step, select your clickable rectangle. We'll be adding the Note Popup modifier there.
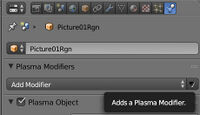
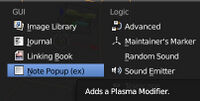
Go to the Physics tab and click on Add Modifier. From the list, under GUI, select Note Popup (ex).
The GUI Note Popup modifier will then appear
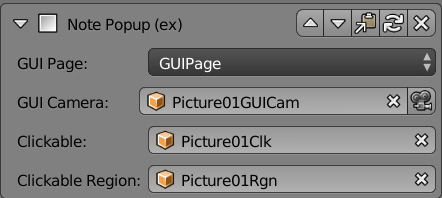
The various parts of the modifier are as follows, from top to bottom:
- GUI Page: Selects the GUI PRP. If this is blank, then the PRP itself isn't set properly (see earlier section).
- GUI Camera: Choose the camera you'd like to use when viewing the GUI object. The camera must be set to the GUI Page or it will not appear. If one is not selected, Korman will create one for you.
- Clickable: If you'd prefer to reference a different object to be the clickable, you can set the object here.
- Clickable Region: Sets the region surrounding the clickable. If this is left blank, Korman will create one for you.
Once the GUI Page is set, you can leave things at that. You may plug in a camera, clickable and/or region object you've added manually here too. Here's an example:
Export the Age
That should be all we need. Now to export the Age with the GUI.
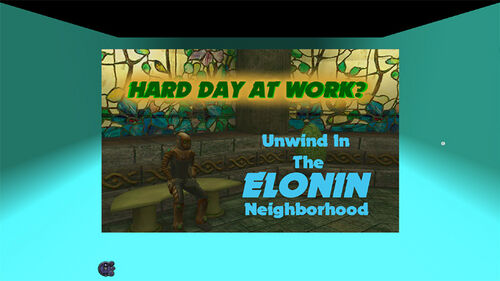
If all goes well, when you click on the picture, a bigger, clearer version will pop up!
GUI "Folder" Setup
To Be Added
Example Blends
The blend used for the single-GUI tutorial can be found here: File:GUITestBlend.blend

