Difference between revisions of "Korman:Getting Started"
m (→Setting Up Your Age) |
m (→Adding Terrain) |
||
| Line 31: | Line 31: | ||
For this demonstration, we'll use a simple plane as the "ground". Bring up your tool shelf in the '''3D View''' window by hovering the cursor there and pressing '''T'''. Click the '''Create''' tab and choose '''Plane'''. | For this demonstration, we'll use a simple plane as the "ground". Bring up your tool shelf in the '''3D View''' window by hovering the cursor there and pressing '''T'''. Click the '''Create''' tab and choose '''Plane'''. | ||
| − | Give your ground a material and texture. Be sure to unwrap the object too by pressing '''Tab->U''' in the 3D window and then choosing an unwrapping option. | + | Give your ground a material and texture. Be sure to unwrap the object too by pressing '''Tab->U''' in the 3D window, pressing '''U''', and then choosing an unwrapping option. |
===Collision=== | ===Collision=== | ||
Revision as of 02:21, 10 March 2016
| This is a tutorial page.Versions available: PyPRP; 3ds Max; Korman. |
This tutorial will familiarize you with basic functions to build an Age in Korman by creating a simple Age from scratch. Be sure to follow the installation instructions to properly set up Blender and Korman.
Contents
[hide]Setting Up Your Age
The first thing you want to do is get the basic information for your Age. If you're intending to release your Age publicly, this includes finding and reserving an unused sequence prefix. Follow the directions at that link to get a prefix and avoid possible conflicts with other fan Ages.
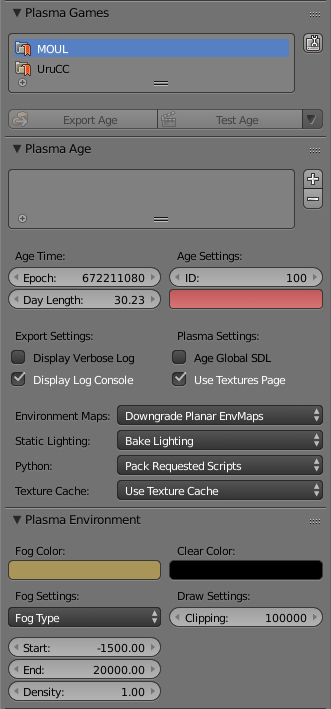
Switch one of your windows in Blender to Properties. Next, click on the World button. Under the Plasma Age panel, put your reserved sequence number under Age Settings:ID. While there, be sure to check Age Global SDL and Use Textures Page.
In this same panel, you can also set the length of your Age's day in hours for a day/night cycle.
This is also where you can add more "pages" to your Age. This is good for organizational purposes. You'll notice this is done for the larger Cyan Ages such as Ae'gura (city) or Gahreesen (garrison). If nothing is here, everything will be exported to a default page.
To add a new page, simply press the plus symbol next to the window under the Plasma Age panel. You can rename it as well (letters and numbers ONLY, NO spaces or special characters).
Under the Plasma Environment settings, you can set your fog color and density. If you'd rather have no fog, click on Fog Type, the click None.
Clear Color sets the background color of the "outside" of your Age should someone inadvertently see it. You can also use it in place of a sky dome if you don't mind one solid color for a sky.
Building a Test Age
Adding Terrain
For this demonstration, we'll use a simple plane as the "ground". Bring up your tool shelf in the 3D View window by hovering the cursor there and pressing T. Click the Create tab and choose Plane.
Give your ground a material and texture. Be sure to unwrap the object too by pressing Tab->U in the 3D window, pressing U, and then choosing an unwrapping option.
Collision
If we export our plane like this, your avatar will fall right through. It needs some collision. In your Properties window, select the Physics button.
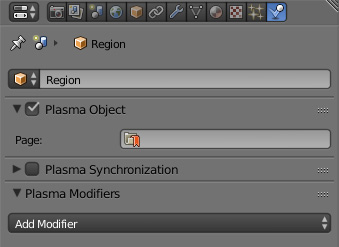
Here, you can rename the object if you'd like (and as you add more objects, this is recommended). For any object you'd like to export, make sure Plasma Object is checked. You can also set which page to which you would like the object exported (selecting nothing exports it to the default page).
If you forget this step for a few objects, don't worry...you can enable everything as a Plasma object when exporting.
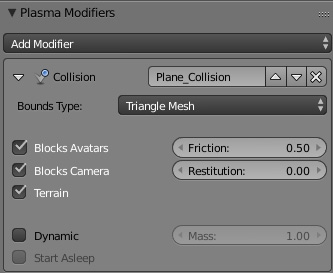
To add collision, click the Add Modifier button under Plasma Modifiers and click Collision.
For the Bounds Type, it's best to use Triangle Mesh for the complicated meshes and Convex Hull for the more simple shapes.
Blocks Avatars should always be checked. For walls and other objects, you would want Blocks Camera selected too so that the camera doesn't pass through.
Terrain needs to be selected for the ground. If not, the avatar will slide around on the surface, so you can deselect this if you'd like to have a "sliding on ice" effect.
Dynamic is used for kickables.
Footstep Region
When we walk on our floor, we want some sounds. For this, we'll need a footstep region.
Add a cube and scale it (S key) so that it encompasses everything.
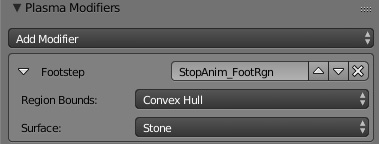
Next, click the Physics button in the Properties window, click Add Modifier and then click Footstep
For bounds, use Convex Hull for simple shapes and Triangle Mesh for the more complicated meshes.
You can choose which type of surface noise for your floor: Dirt, Grass, Metal, Puddle, Rope, Rug, Stone, Water, Wood Bridge, Wood Floor, and Wood Ladder.
Adding a Link In Point
Our next step is to add a place for the avatar to Link into the Age. For this, we'll need to place an Empty object. In your 3D View window under the Tools tab, scroll down and click Empty.
Your empty should be placed about 1 Blender unit above your plane so that your avatar won't fall through or get stuck in the floor AND so it won't look like your avatar is dropping out of the sky slightly when Linking in.
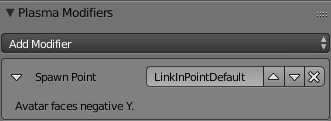
With the empty selected, go back to your Physics panel in the Properties window. Rename the empty to LinkInPointDefault (any other Link in points after this can be named something else). Once again, click Add Modifier and then choose Spawn Point.
In the 3D Window, switch the orientation from Global to Local. Note that the avatar will face AWAY from wherever the spawn point's local Y axis (green arrow) is pointing, so rotate it according to where you want the avatar facing when it appears in the Age.
Panic Linking
What if we fall off this platform? We can add a Panic Link Region, useful for Linking the avatar out of hazards or if they somehow fall out of the Age.
For our example Age, we'll create a cube. Resize it and make it very large. Move it a short distance below the Age. To apply all the changes to the region, press Ctrl+A and then click Rotation and Scale.
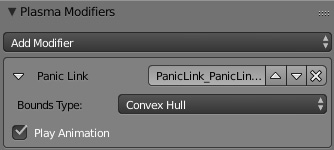
Click on the Physics button of the Properties window, then click on Add Modifier, then Panic Link. Convex Hull is usually the best Bounds type, but if your panic region mesh is more complicated in shape, you can use Triangle Mesh.
If you'd prefer the avatar not grab for the Relto book when it falls, you can uncheck Play Animation.
Lighting
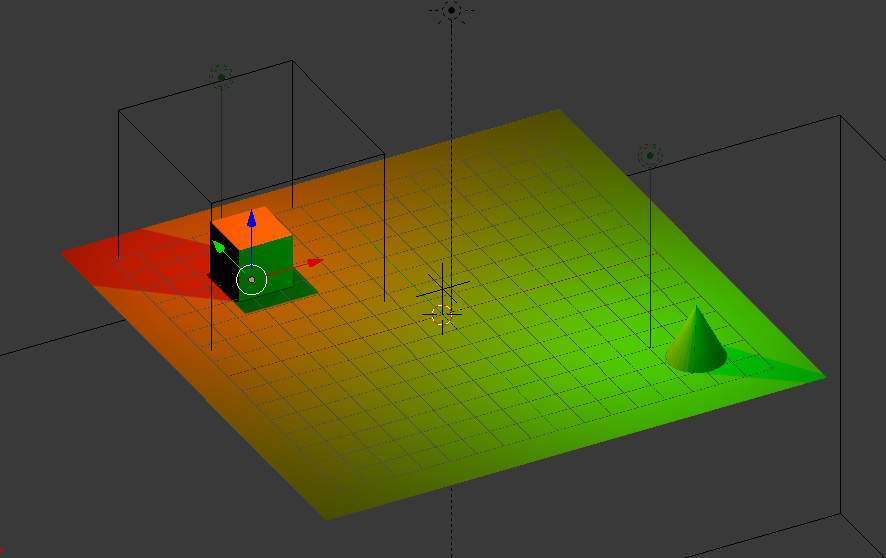
Things are looking a little dark in here, so let's add a few lamps. The most common are Point lamps or a Sun lamp, but all should work with proper placement. Add any of these, choosing color, energy and location.
If you want any lamp to cast light on the avatar after export, you must check Plasma Object in the Physics panel in the Properties window.
Lightmapping
Now that we have some lighting, we can also create lightmaps.
NOTE: Unlike PyPRP, you will not need to uncheck all textures before this process. In fact, doing so will keep them from exporting at all.
By default, only lights with Plasma Object unchecked will cast on to a lightmap, but they won't cast light on the avatar upon export, which won't look realistic.
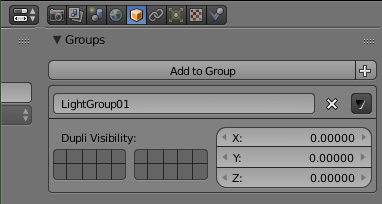
To create a lightmap and light the avatar, we must first have all lights we want to cast light put into a group. Select the first light and click on the Object button (orange box) in the Properties window.
Under the Groups panel, click on the + next to Add to Group to create a new group. Name it something you'll remember in the form below. Select each lamp you want included in the group, click the Add to Group button and select your light group. All the lights in the group should now have a green outline in the 3D window.
Next, select your ground plane. Go back to the Physics panel and click Add Modifier->Lightmap.
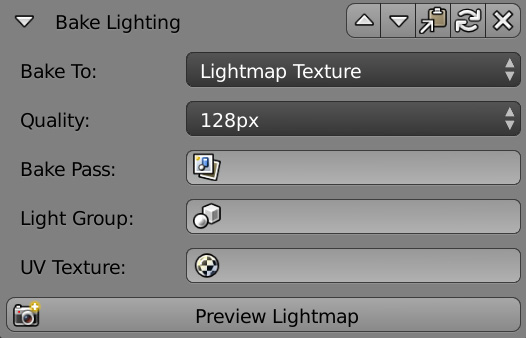
In this new panel, you can select the size of the lightmap image. For larger and/or more complex objects, it's best to choose a larger size (1024px).
Note the Active Render Layers section. Here, you can choose what objects on which layers will affect the lightmap.
Next, choose your Light Group from earlier (if you don't, only non-Plasma Object lights will project on to the surface).
You can leave your UV Texture blank. Otherwise, if you already have a Lightmap UV map, you can choose that instead.
To see if the lightmap will turn out the way you like, you can click Preview Lightmap. If it doesn't look right, you can change the settings and UV mapping.
Exporting
Now, we are ready to export the new Age.
Expanding Your Age
To further add to your Age, you can use any of the associated tutorials for Korman.

