Difference between revisions of "Korman:Animations"
m (→Offset) |
m (→Basic Setup) |
||
| Line 11: | Line 11: | ||
[[file:KorAnim02.jpg]] | [[file:KorAnim02.jpg]] | ||
| − | Under '''Frame Rate''', switch from the default '''24 fps''' to '''30 fps'''. This is because the URU game engine operates at 30 frames-per-second for its animations. If this isn't set, animations will | + | Under '''Frame Rate''', switch from the default '''24 fps''' to '''30 fps'''. This is because the URU game engine operates at 30 frames-per-second for its animations. If this isn't set, animations will stutter in-game. |
==From PyPRP to Korman== | ==From PyPRP to Korman== | ||
Revision as of 13:14, 31 August 2015
| This is a tutorial page.Versions available: PyPRP; 3ds Max; Korman. |
This tutorial will cover the various types of animations that Korman can export.
Contents
[hide]Basic Setup
To start, we need to modify the blend file's settings slightly.
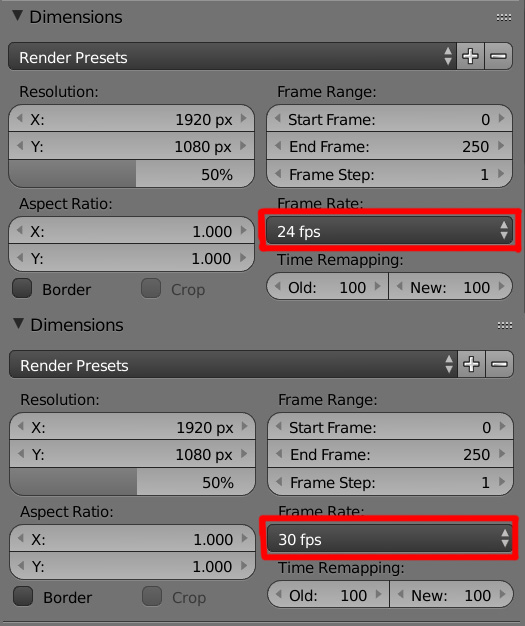
Click on the Render button in the Properties window.
Under Frame Rate, switch from the default 24 fps to 30 fps. This is because the URU game engine operates at 30 frames-per-second for its animations. If this isn't set, animations will stutter in-game.
From PyPRP to Korman
If you're importing animated objects into 2.74 from 2.49b, your old IPO curves (now called f-curves) will carry over, but only your object animations.
Any texture animations will not transfer properly. Currently, the solution is to delete all the old curves and redo the animations.
If there is a method to properly carry texture IPO curves over to 2.74, it can be added here.
Note: each change you make to a texture animation will require you to delete the corresponding SAV file for the Age in the offline version of URU.
Object Animations
Setting an Object for Animation
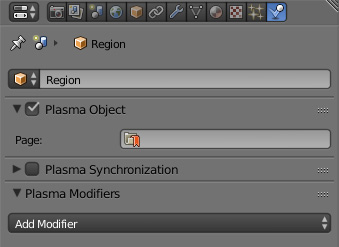
To designate an object for animation, go to the Physics button in the Properties window.
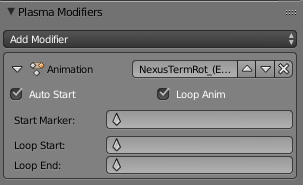
From there, click on Add Modifier and choose Animation. A new panel will appear.
NOTE: This step is not needed for objects with texture (layer) animations only.
Location Rotation and Scale
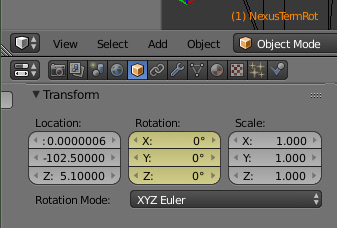
To properly animate, you will need two windows in your Blender setup: your usual 3D View window and one set to Timeline. You may also want to set a window to Properties and select the Object button (orange box), scrolling over to the Transform panel.
Note: animating the scale of an object was not possible in PyPRP but has been implemented in Korman.
In the Timeline window, the box marked in the picture is the current frame of animation:
This usually starts at 0 or 1, but the animation can presumably start at any frame. Just remember which frames begin and end your animation if you intend to set them to responders (clickables) later.
For the start of your animation, select your object in the 3D View and press I. Choose from any of the first seven options:
- Location
- Rotation
- Scaling
- LocRot
- LocScale
- LocRotScale
- RotScale
If all goes well, the name of the object displayed in the lower left corner of the 3D View window will turn orange. The fields in the Transform panel of the Properties window will also turn yellow.
Next, in the Timeline window, change the current frame to progress the time.
Note: 30 frames in Blender = 1 second of animation in URU.
Now move, rotate, and/or scale your object however you like. When all is set, press I again and choose the animation options you want.
Keep doing this for each change in your object you would like in the animation. To recap:
- Change the current frame
- Modify your object
- Press I in the 3D View window and choose animation options
If you'd like to preview your animation in Blender, in the Timeline window, set your Start and End fields to the beginning and ending frames of your animation, then press the Play button (fourth button to the right of the current frame field) to view the animation in the 3D View window.
Path Animations
Coming soon!
Texture (Layer) Animations
Texture animations have also changed a bit since Blender 2.49b, but the idea is essentially still the same: moving a texture along an object by offsetting the image along the UV mapping's X and Y axes.
For this animation, you'll need a window set to Properties and the other to Timeline.
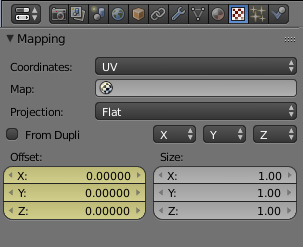
In the Properties window, click on the Texture button and scroll over to the Mapping panel:
Offset
Note the Offset fields:
We'll start our first keyframe at the UV map's original position. For this, simply hover your mouse cursor over the Offset fields and press I. The fields will turn yellow (pictured above).
In your Timeline window, change the current frame to the next. Remember, 30 Blender frames = 1 URU second.
Ofsetting by 1 will move the UV map along the chosen access by one length of the UV map itself, so if your UV map encompassed the entire texture, it will shift to the left, right, top, or bottom of where it originally was.
An example of a UV map offset on the X axis by 1:
Note: The UV Image Editor won't actually do this when you animate the offset. This picture was only for demonstration purposes.
With just these two keyframes looped for a properly tiled texture, this would be enough to have one, continuous texture animation, which is useful for such things as a waterfall texture. With enough UV mapping know-how and a proper texture, you can even have a frame by frame texture animation using offsets.
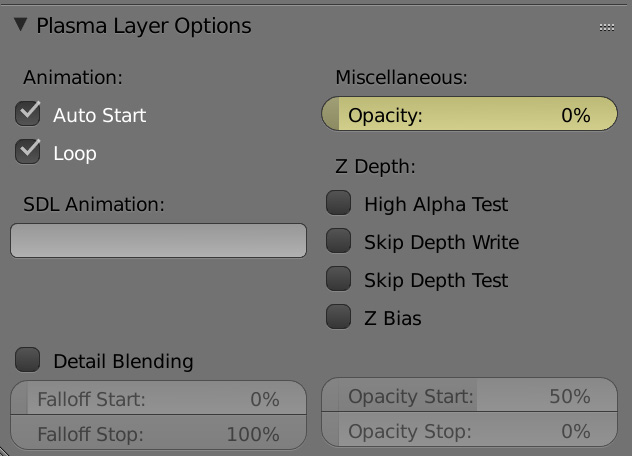
Once you have all the keyframes you want, in your Properties window, scroll to the end until you see Plasma Layer Options.
Here, you can set the Auto Start and Loop options as well as the opacity of the entire texture.
Opacity
If you want a texture to fade in and out, you can animate the opacity, or the texture's transparency, in much the same way as offsets.
100% opacity will show the full texture while 0% will make it disappear completely. Everything in between will give the whole texture some degree of transparency depending on the percentage you set.
You can set the opacity to a keyframe by selecting the frame you want in the Timeline, setting your desired opacity with the slider, and pressing I while hovering the mouse cursor directly over the opacity slider itself.
If done correctly, the opacity slider will turn yellow.
Do this for as many keyframes as you like. The texture will fade in and out based on what opacity percentage you select for each keyframe.
Again, set Auto Start and Loop accordingly in the Plasma Layer Options panel.
Keyframe Types
Now that your animations are set, you can modify the keyframes in your f-curves to work the way you want. The lines between each keyframe are exported in two ways: bezier and linear.
A keyframe set to bezier will cause the object to slow, stop, then slowly start up again at each keyframe. This is good for the first and last keyframes of such animations as a hanging lamp swaying slightly or the opening and closing of doors as it looks more natural.
Linear will keep the animation smooth over each keyframe. Setting all keyframes to linear will give you one continuous animation, such as a constant rotation of a Nexus pedestal gear.
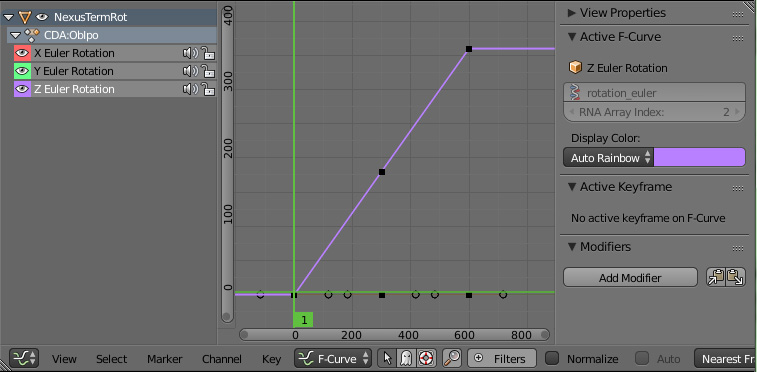
In order to manage keyframes, you need to switch one of your work windows to the Graph Editor window.
If you switch to this window and see ALL your animated objects listed, make sure the "mouse pointer cursor" button on the toolbar is selected (to the left of the "ghost" button; see above picture).
Here, you can select which part of the animation to manage. You can click on the eye icon for each curve to make it appear and disappear in the window; helpful if you're having trouble seeing a certain curve.
To set an entire curve to linear, keep pressing A until all keyframe points are orange instead of black, press T in the Graphs window, and select Linear. Similarly, you can do the same to set all keyframes to Bezier.
To change only a specific keyframe, right click on it. Bring up the Properties menu by pressing N. Under Active Keyframe, you can select Linear or Bezier.
Setting Up Animations For URU
Looping Animations
To control animations without a responder, simply make sure Auto Start and Loop Anim are both checked in the animation modifier (for object animations) or in the Plasma Layer Options (for texture animations). Korman will export all keyframes and loop the animation accordingly.
Responder (Clickable) Animations
To connect your animations to a clickable or region sensor, you can consult the logic nodes tutorial.

