Difference between revisions of "Korman:Clickables"
m |
m (→Logic Nodes) |
||
| Line 80: | Line 80: | ||
| − | ==Logic | + | ==Logic Node Clickables== |
''Coming soon!'' | ''Coming soon!'' | ||
| − | |||
==Troubleshooting== | ==Troubleshooting== | ||
Revision as of 20:52, 10 July 2015
| This is a tutorial page.Versions available: PyPRP; 3ds Max; Korman. |
This tutorial will show you how to set up clickables for any object.
NOTE: More types of clickables will be added as Korman develops.
Contents
Requirements
For a clickable in Korman, you will need at least two things to start:
- The clickable object
- A region surrounding the clickable, with enough space for an avatar to enter
Rotation and Scale
To prevent warping of clickables, it is recommended that, once everything is resized and positioned the way you want, that you reapply rotation and scale to the object to prevent warping upon export.
To do this, select the object in the 3D window, then press Ctrl+A, then click on Rotation and Scale. Do this for the clickable and its region.
Modifier Clickables
Sitting Mods
A sitting mod will allow the avatar to sit on an object when clicked.
For this, you will also need an Empty object added on the floor under the clickable.
Updating From PyPRP
If you already have a sitting mod set up in an existing Age, you only need to add an Empty in the same place and position as your clickable.
To do so, select your clickable in the 3D View window. Next, press Shift+S, then 4 to snap the cursor to the clickable's center.
Next, go into the Create tab in your Tools (press T in your 3D View) and click Empty to add an empty at your clickable's center.
Switch from Global to Local at the bottom of the 3D View window.
Press A until nothing is selected in 3D View, then select the empty, hold Shift, then select the clickable.
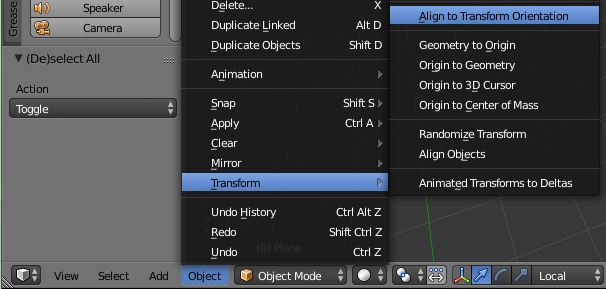
On the toolbar, click Object->Transform->Align to Transform Orientation.
This should turn the Empty so that its axis is now facing the same way as your clickable. If it doesn't work on the first try, press Ctrl+Z to undo it.
Your sitting mod is now ready for the new method!
A Note about Collision
While your clickable can have its own collision, with sitting mods, the avatar can sometimes get "stuck" within the clickable. If this happens, you can create a fourth object to sit within the clickable while turning collision on the clickable off. You can keep shrinking this collider until the avatar can sit down and stand up without getting stuck.
Adjusting the Region
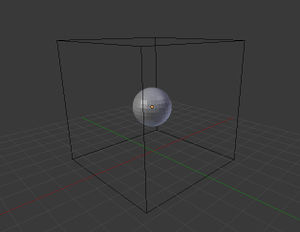
It's recommended to make the logic region a simple cube encompassing the clickable and a good distance out. To make sure the region's dimensions and size are exported properly, type Ctrl+A and then select Rotation and Scale.
Setting Up The Clickable
First, select your empty. Remember that the Empty's local Y axis should be pointed in the opposite direction from where you would like your avatar to face while sitting.
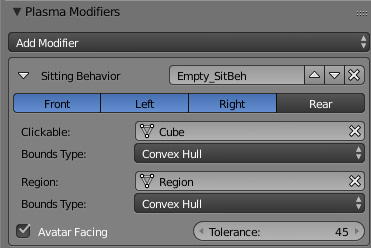
Next, go to the Properties window, then select the Physics tab (the bouncing ball on the far right). Click Add Modifier and then Sitting Behavior. In the new window, there are a few options you can adjust.
Front, Left, Right, and Rear are the four directions from which you can approach the sitting mod. Hold down Shift and click on any of these to select (blue) or deselect (grey) them.
In the Clickable form, choose your clickable. The most common Bounds Type for this is Convex Hull (note that this will NOT affect the object's collision).
In the Region form, choose your region. Again, Convex Hull is the best Bounds type.
The Avatar Facing function will cause the clickable to turn off if your avatar is not facing it. This is handy if you have many sitting mods in a small space.
If your sitting mod doesn't work, try unchecking Avatar Facing.
The Tolerance is the degree the avatar must be turned towards the clickable for it to activate. It is recommended to keep this at 57 or below.
Logic Node Clickables
Coming soon!
Troubleshooting
If your clickable isn't working, here are some things to check:
- Do all objects have Plasma Object checked in the Physics panel? If not, they won't export.
- Reapply the region's Scale and Rotation (Ctrl+A->Rotation and Scale)


