Difference between revisions of "PyPRP:Creating a Swim Region"
(→Step 3 - Adding AlcScript: 3 types of currents) |
m (Add tutorial category and template.) |
||
| (9 intermediate revisions by 5 users not shown) | |||
| Line 1: | Line 1: | ||
| + | {{Tutorial|Creating a Swim Region}} | ||
| + | |||
Adding swimregions is actually pretty straight forward. Although I have had some problems implementing them. Mainly because of one particular embarassing mistake Trylon pointed out to me yesterday. :( ;) But.. things are working now, so let's get started. | Adding swimregions is actually pretty straight forward. Although I have had some problems implementing them. Mainly because of one particular embarassing mistake Trylon pointed out to me yesterday. :( ;) But.. things are working now, so let's get started. | ||
| Line 12: | Line 14: | ||
| − | Talking about transparancy: always use PNG images when adding transparant textures. JPG files are not able to include an alpha channel. As you might | + | Talking about transparancy: always use PNG images when adding transparant textures. JPG files are not able to include an alpha channel. As you might know GIFs kinda support transparancy, but only for one color. This is not a real alpha channel and makes seamless blends impossible. Using GIFs would result in jerky edges. But don't worry about accidentally using Gifs. Blender does not support them at all. |
[[Image:WaterTex.jpg]] | [[Image:WaterTex.jpg]] | ||
| − | Personally I think my water looks pretty cool in Plasma. And didn't I told you about the fancy tiles? ;) To bad the water is still static. Imagine my little pool with | + | Personally I think my water looks pretty cool in Plasma. And didn't I told you about the fancy tiles? ;) To bad the water is still static. Imagine my little pool with the reflective water method (wasn't available when writing this tutorial :) ). |
[[Image:PoolAge.jpg]] | [[Image:PoolAge.jpg]] | ||
| Line 103: | Line 105: | ||
Have a look at the AlcScript for straight currents before we'll discuss the parameters. | Have a look at the AlcScript for straight currents before we'll discuss the parameters. | ||
| − | + | <pre> | |
| − | + | RgnSwimPool: | |
| + | type: region | ||
| + | regiontype: swim | ||
| + | region: | ||
| + | swim: | ||
| + | style: straight | ||
| + | straight: | ||
| + | centerpoint: CurrentGuide | ||
| + | neardist: 160.0 | ||
| + | nearspeed: 4.0 | ||
| + | fardist: 186.0 | ||
| + | farspeed: 8.0 | ||
| + | </pre> | ||
The values I added are the default values for straight currents. | The values I added are the default values for straight currents. | ||
| + | |||
| + | The direction of the current is determined by the y-vector of the empty. To set the direction of the current, rotate the empty - preferable from top view - until its y-vector points towards the desired current direction. | ||
| + | |||
| + | |||
| + | The parameter "fardist" does count only in the direction (Y-component of centerpoint) of the flow, not reverse. | ||
| + | So, "behind" the centerpoint nearspeed is used, regardless of fardist. | ||
| + | |||
| + | Here's how the parameters neardist and fardist are used for style: straight | ||
| + | |||
| + | [[Image: SwimPlan_StyleStraight.png]] | ||
| Line 161: | Line 185: | ||
| − | + | [[Category:AlcScript]] [[Category:PyPRP]] | |
| − | + | ||
| − | + | ||
| − | + | ||
Latest revision as of 08:37, 10 September 2018
| This is a tutorial page.Versions available: PyPRP; 3ds Max; Korman. |
Adding swimregions is actually pretty straight forward. Although I have had some problems implementing them. Mainly because of one particular embarassing mistake Trylon pointed out to me yesterday. :( ;) But.. things are working now, so let's get started.
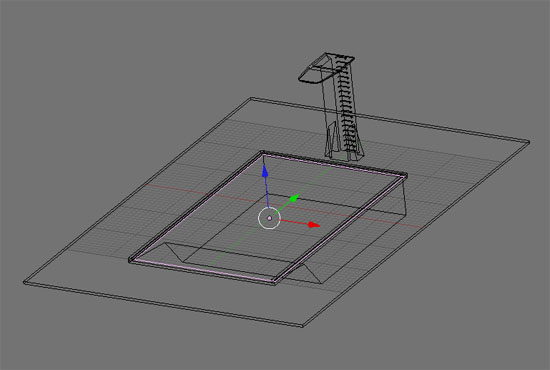
Let's have a look at our working model first. I must admit that creativity was at an absolute minus zero when I thought up this little age. Nothing mystical, no fantasy element, nothing. Just the first thing that came to mind when I thought about swimming ;) Still I did try to make it look a bit fancy, with nice tiles and stuff. At lease give me some credit for that!?
If you look at the model you can see that I have a plane selected (pink). This plane is my water mesh. I specifically didn't set the bounds for this mesh. If I did you would be able to walk on water. Interesting, but not what we want here.
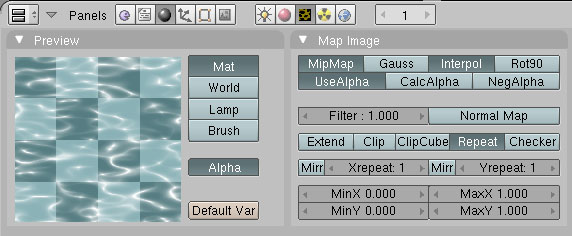
I gave this mesh a transparent texture, or more of a semi transparant texture which I created with FilterForge. I wanted a pool-blue color with caustics, transparant enough to show the tiles in my pool but also show some color. The texture has a transparant blue layer to accomplish this. The white caustic shape is not transparant, but does blend in. Don't forget to set the "Use alpha" option in Map Image to make your alpha channel work in Plasma.
Talking about transparancy: always use PNG images when adding transparant textures. JPG files are not able to include an alpha channel. As you might know GIFs kinda support transparancy, but only for one color. This is not a real alpha channel and makes seamless blends impossible. Using GIFs would result in jerky edges. But don't worry about accidentally using Gifs. Blender does not support them at all.
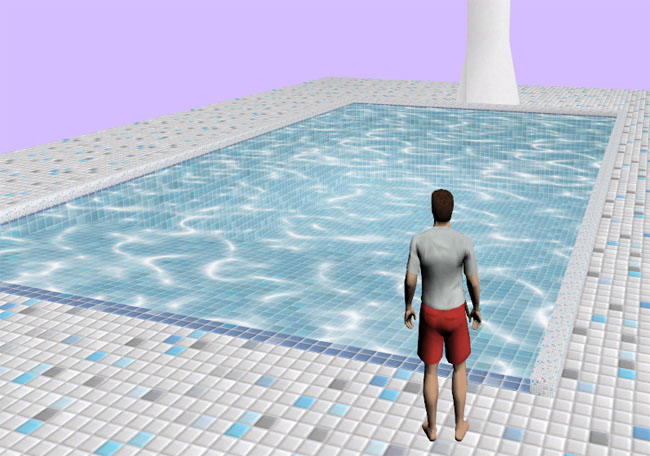
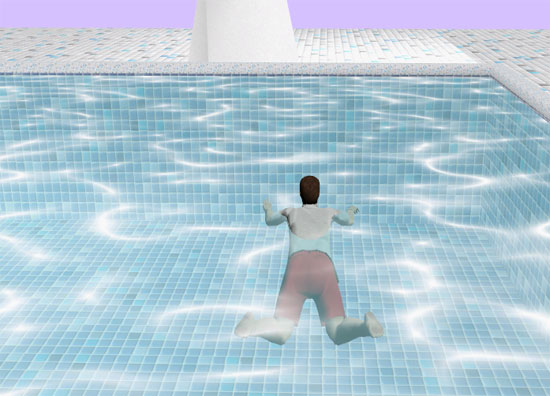
Personally I think my water looks pretty cool in Plasma. And didn't I told you about the fancy tiles? ;) To bad the water is still static. Imagine my little pool with the reflective water method (wasn't available when writing this tutorial :) ).
Contents
- 1 Step 1 - Adding your actual "water" region
- 2 Step 2 - Adding a Swim detection region
- 3 Step 3 - Adding AlcScript: 3 types of currents
- 4 Step 4 - Adding a "current" empty
- 5 Step 5 - Adding Alcscript for straight and circular currents
- 6 Step 6 - To finish things of: let's splash!!
- 7 Checklist - wrapping up
Step 1 - Adding your actual "water" region
I added a plane the same size as the one I textured and named it "RgnSwimPool". For this plane I set bounds to "Static TriangleMesh". Also be sure this mesh has a face! That's what I forgot and what cost my hours and Trylon to find out. Since I work in wireframe mode most of the time I didn't notice. No face means nothing to swim in :).
Step 2 - Adding a Swim detection region
Now to make sure your avvie understands that the above region is a region to swim in we need a swim detect region.
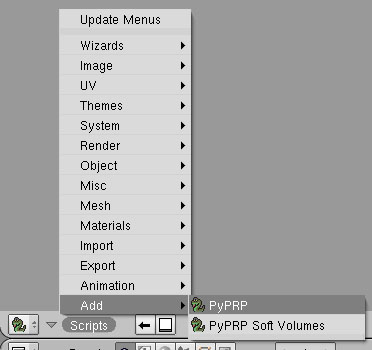
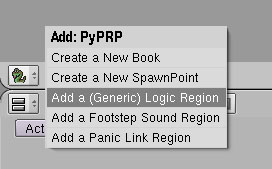
Change one of your Blender views to scripts and use the "Script" menu to add a PyPRP region. From the offered region types choose "Add a (Generic) Logic Region". In my case I named it "RgnSwimDetect".
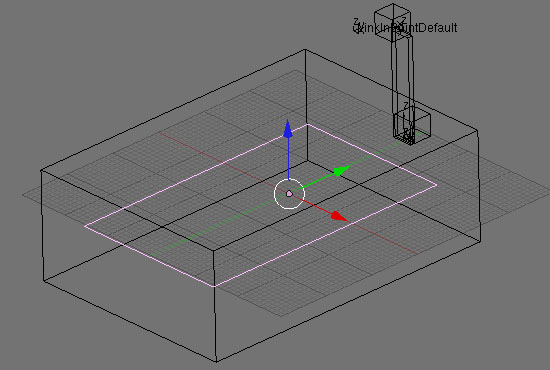
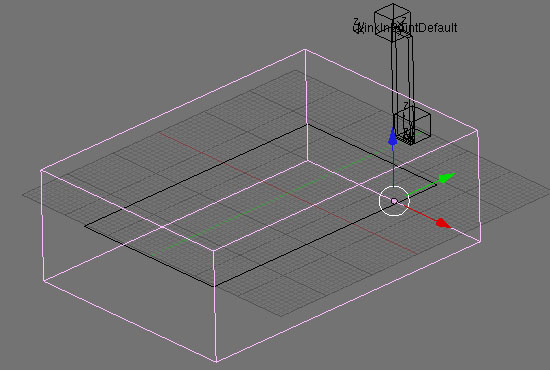
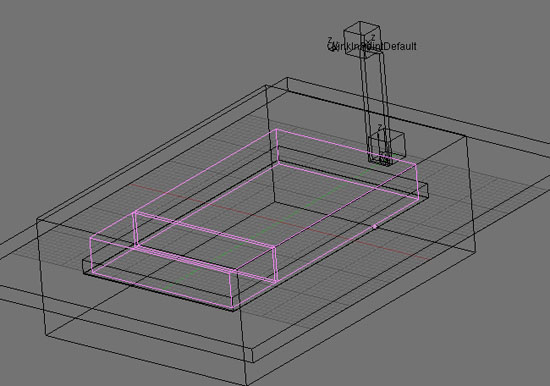
And this is what "RgnSwimDetect" looks like. I made it large enough to easily encompass the entire swim region (RgnSwimPool) and some more.
With our regions in place, let's move on to some actual swimming!
Step 3 - Adding AlcScript: 3 types of currents
At the moment Plasma supports three kinds off currents, each having their own swim style setting in AlcScript:
- No current -> Simple
- Straight current -> Straight
- Circular current -> Circular
We'll start with the No current one since we have everything in place to make it work. For the other two to work we will add an empty later on, to give our region an anchor point for the currents strength and direction. In case of the Circular current this will actually be the center of the current.
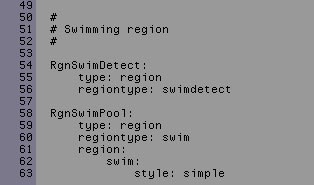
Let's move on to some basic AlcScript for a No current swim region. Remember the names of our regions? Our swim region is called RgnSwimPool and our swim detection region is called RgnSwimDetect. Now have a look at the AlcScript I added for both:
Before going on and knowing more AlcScript will follow I would like to ask your attention for the way AlcScript is entered. First off all you have to make one of your Blender views a "Text" view. Now use the dropdown in this view to select "AlcScript". Be very careful entering the AlcScript code. As with any type of code the indents, colons, uppercase/lowercase stuff is all critical. So pay attention and check your code twice. Nothing more frustrating than exporting and find your cade failing because of a simple typing error.
So far for this little lecture. There are more settings for "Simple" we want to have a look at. None of these are necessary for a simple swim region to work since the plugin will assign some default values, but they might add to the experience you are looking for in your age. I'm still figuring out what they do and what values can be set, so let's see what we can find out together. The parameters available:
- DownBuoyancy (default value 2.0)
DownBuoyancy sets the depth you will sink to when jumping into the water.
- UpBouyancy (default value 11.0)
With UpBouyance you can set the height your avvie will rise above the water surface after rising from the deep. Kinda how it pops up. After that the avvie will be in swimming position.
- MaxUpwardVel (default value 5.0)
MaxUpwardVel sets the speed with which the avvie moves up to the surface.
So why would you need these? Well assume you have a cliff your avvie needs to jump of from to get to some hidden place in your age. It would be unrealistic if the avvie would jump 30 feet and not sink a few meters and pop up again. With the settings above this can be simulated.
Okay... export your age and take a plunge!!
Step 4 - Adding a "current" empty
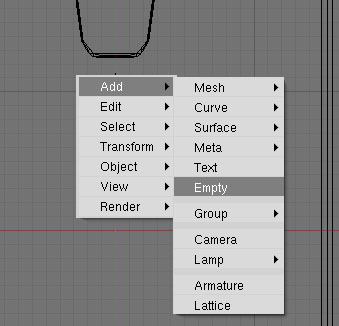
If you want your swim region to have a current, either a straight or a circular one, you have to set the direction and strength of the current. To do so we will create an empty. This empty will function as an anchor- or center point for the current.
Put your cursor at a point above your swim region where you want the anchor to be. I suggest you switch to top view with numpad 7. Place the empty close to the swim region on the Z-axis and inside it for both the X-axis and Y-axis.
I called the empty "CurrentGuide". We will need this object name as a reference in AlcScript.
Step 5 - Adding Alcscript for straight and circular currents
With everything including the empty set we can add some extra AlcScript for our currents. First off: a straight current. As you will see in the AlcScript below I added some lines specifically to set up the current. Notice how I linked the empty to the swim region?
Have a look at the AlcScript for straight currents before we'll discuss the parameters.
RgnSwimPool:
    type: region
    regiontype: swim
    region:
        swim:
            style: straight
            straight:
                centerpoint: CurrentGuide
                neardist: 160.0
                nearspeed: 4.0
                fardist: 186.0
                farspeed: 8.0
The values I added are the default values for straight currents.
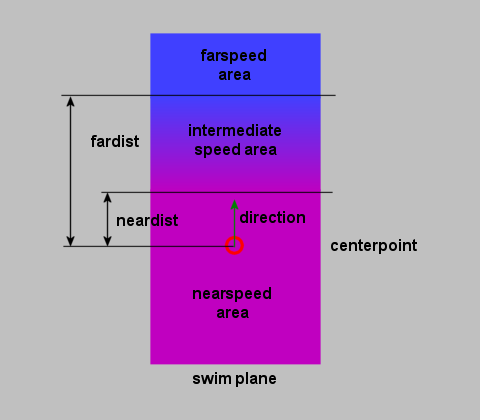
The direction of the current is determined by the y-vector of the empty. To set the direction of the current, rotate the empty - preferable from top view - until its y-vector points towards the desired current direction.
The parameter "fardist" does count only in the direction (Y-component of centerpoint) of the flow, not reverse.
So, "behind" the centerpoint nearspeed is used, regardless of fardist.
Here's how the parameters neardist and fardist are used for style: straight
[Work in progress]
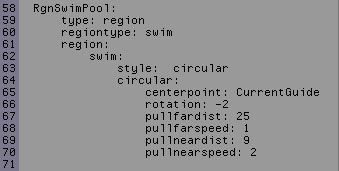
For a circular current I added the AlcScript below. I simply copied the settings from FuncChk which features this type of current. Let's have a look at what they do.
So what do all these accomplish?
Rotation will set the direction and speed of the rotation of a circular current. A negative value will make it rotate clockwise, while a positive value will make it rotate counterclockwise. The value you assign will influence the speed of the rotation.
[Work in progress]
Step 6 - To finish things of: let's splash!!
Jumping from my little springboard or just running into my pool without the clear sound of splashing water wouldn't be satisfying. So besides adding a footstep region to my pool side tiles and the metal ladder, I have also added some footsteps to the pool water.
Again have a look at the second layer, where I hide my regions.
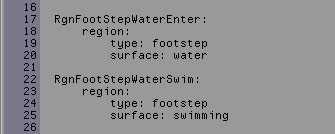
I added two more region which I selected above. The smaller one covers the part where my avvie can still walk. To this region, which I called RgnFootStepWaterEnter, I added footstep type "water". To the big one , RgnFootStepWaterSwim which covers the deep end of the pool, I added "swimming". I had them overlap a bit for a seamless transition. The AlcScript for this:
Checklist - wrapping up
To finish this tutorial I will offer a little checklist or summary. Hopefully this will help you in case you run into trouble.
Checklist
- Add a swim region in layer 2 (which can be a copy of your textured plane)
- Bounds are set to "Static TriangleMesh"
- Region should have a face
- Add Generic Logic region in layer 2 as a swim detect region encompassing more space than the swim region
- When using currents add an empty in layer 2 to set the anchor point for the currents settings (strength, direction, etc.)
- Add AlcScript as above making sure you format the code correctly
- Remember the three swim styles: simple, straight and circular
- Make sure any planes you add for textures to appear don't have bounds set!
- Also make sure to set "Use alpha" if you want water texture to appear transparant
And that's it! We have a nice pool, with transparant blue water with a caustics texture, and we also have sounds to make the entire experience more realistic. Only one thing remains... some good advice:
Don't dive from the side of the pool and be careful running with wet feet!!! ;)

